Admin/Scheduler
Adding Business
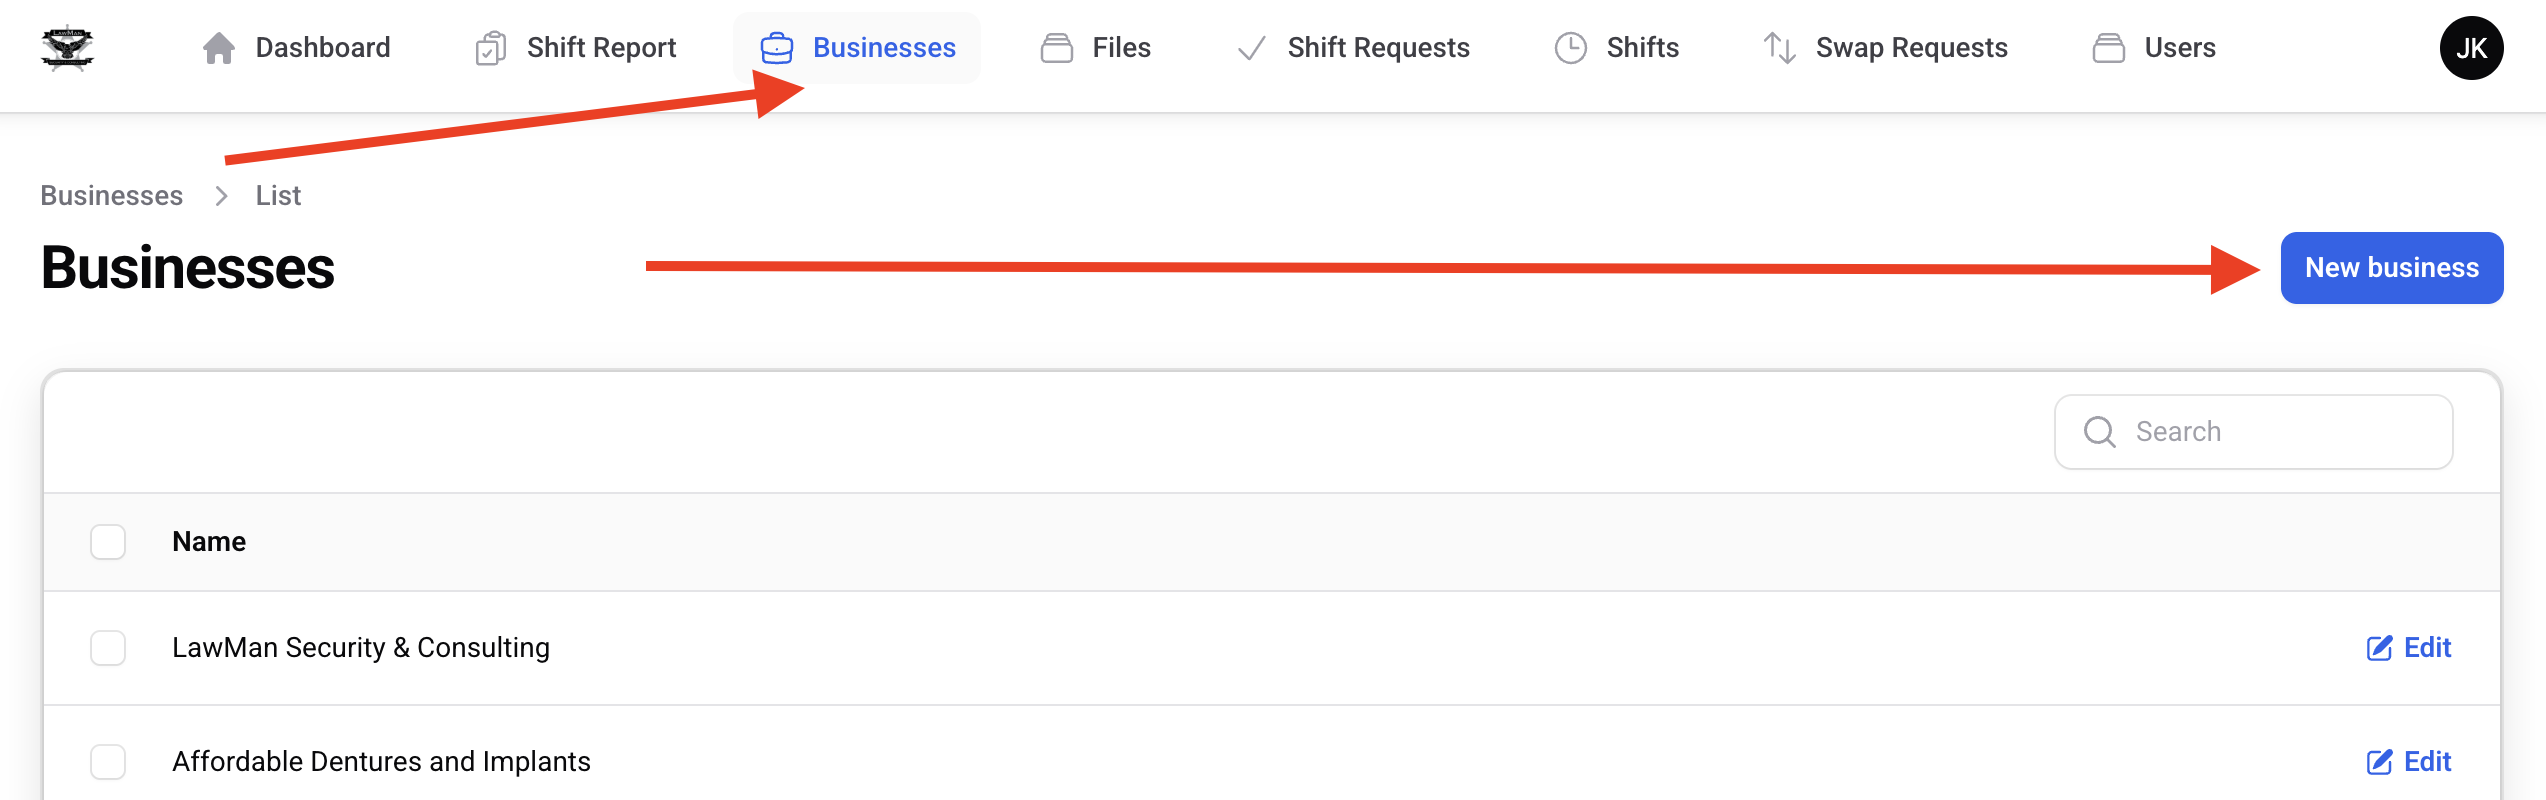
- Click "Businesses" then "New Business"
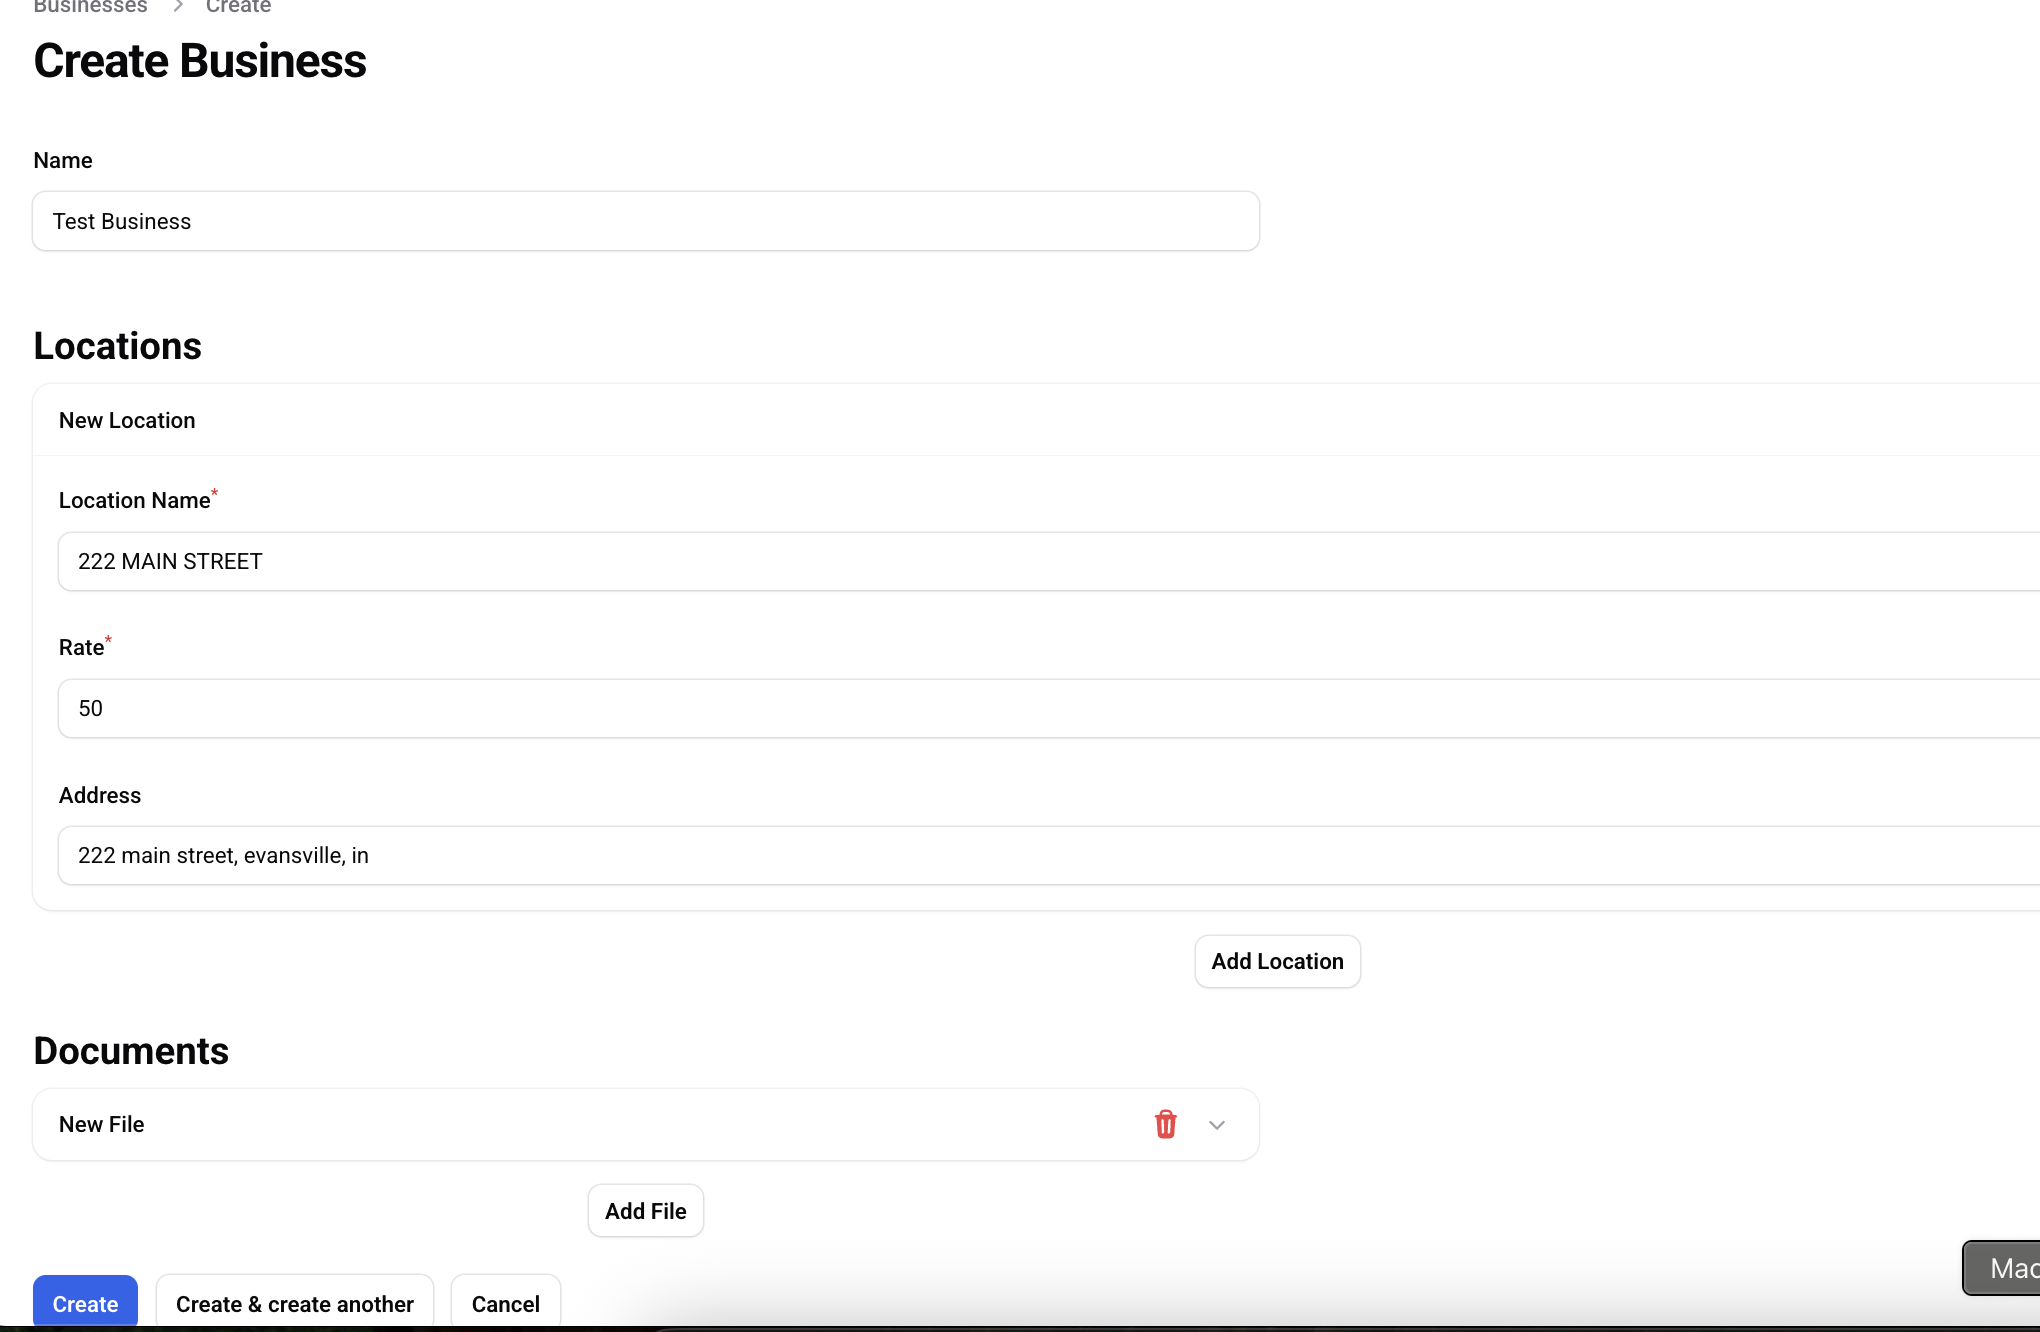
- Upload your business logo or image (optional):
- Set the name
- Every business must have at least 1 location. The rate is the rate for this location. Anyone assigned to a shift at this location will be paid that rate unless you set a special rate when creating the shift
- If there are any files you would like to assign specifically to this location you can do so here
Assigning Contractors to Businesses
- You can search for specific contractor in the "Users" section
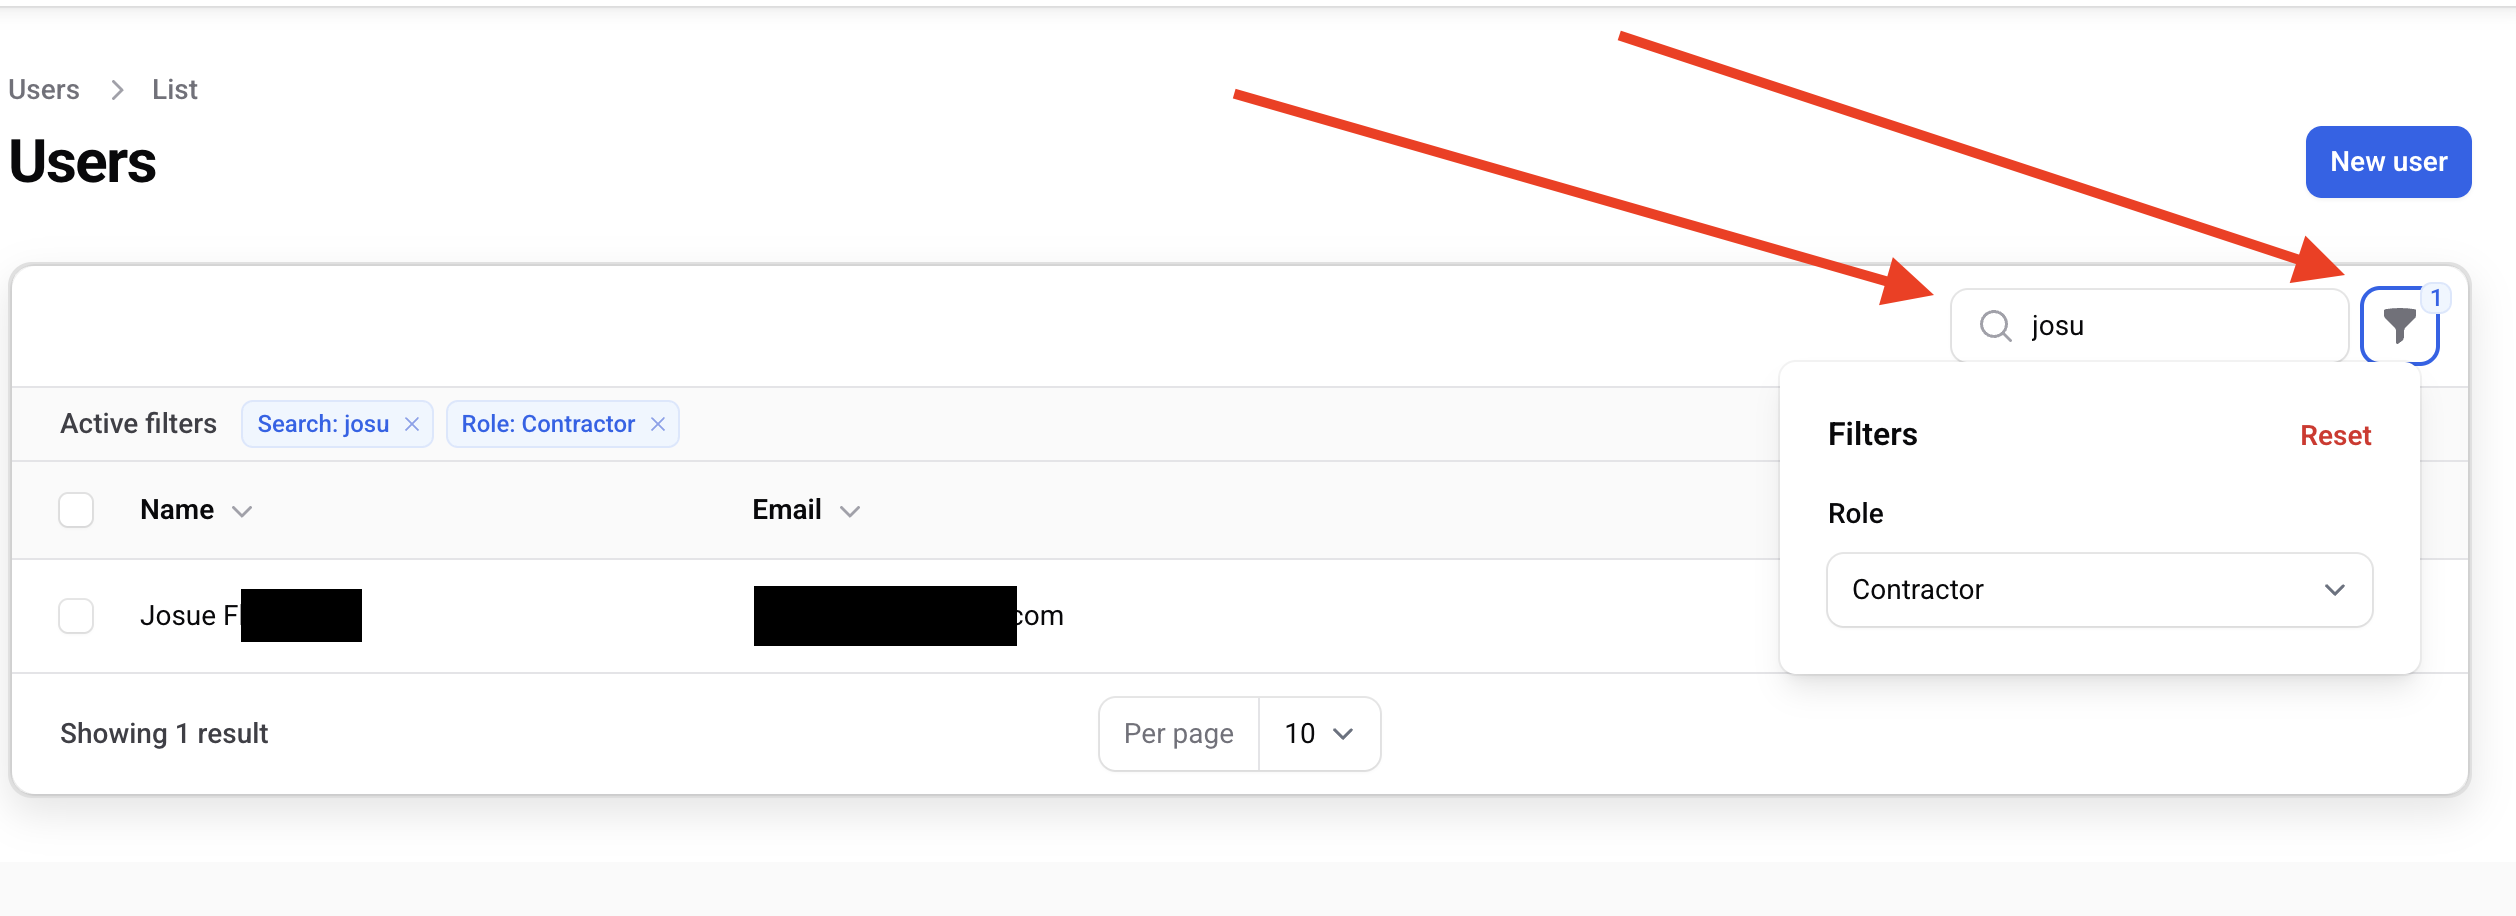
- From there, you can search and add businesses
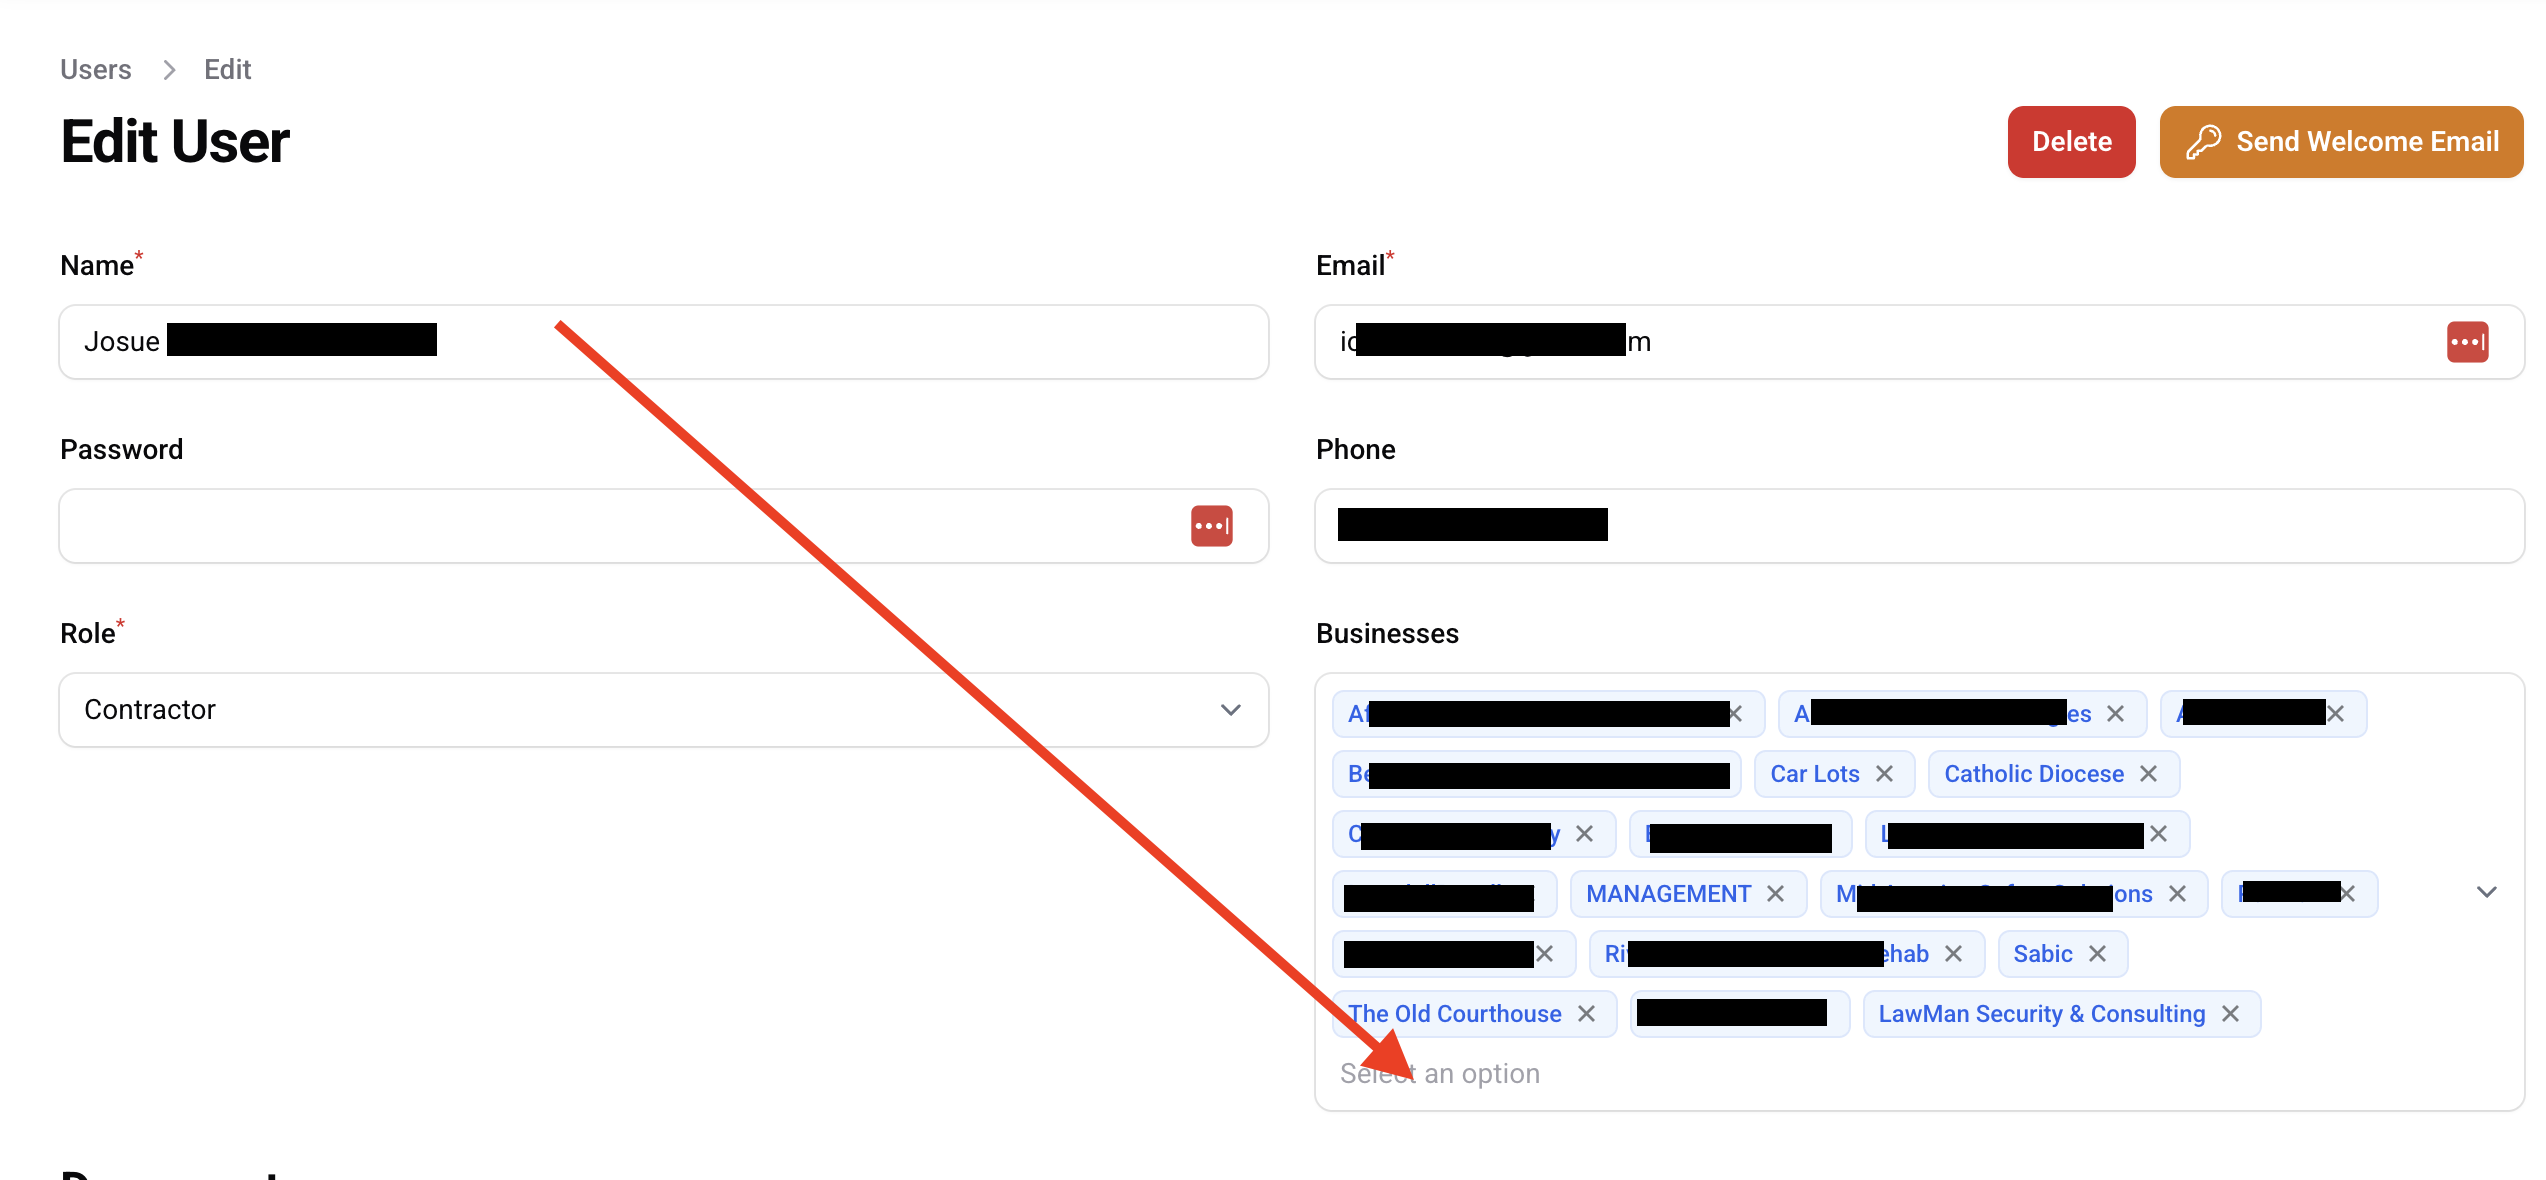
- After they've been added to a business, they will see shift related to those businesses in their app
Sending Welcome/Password Reset Emails
- From the user edit screen, you can click the "Send Welcome Email" link in the upper right
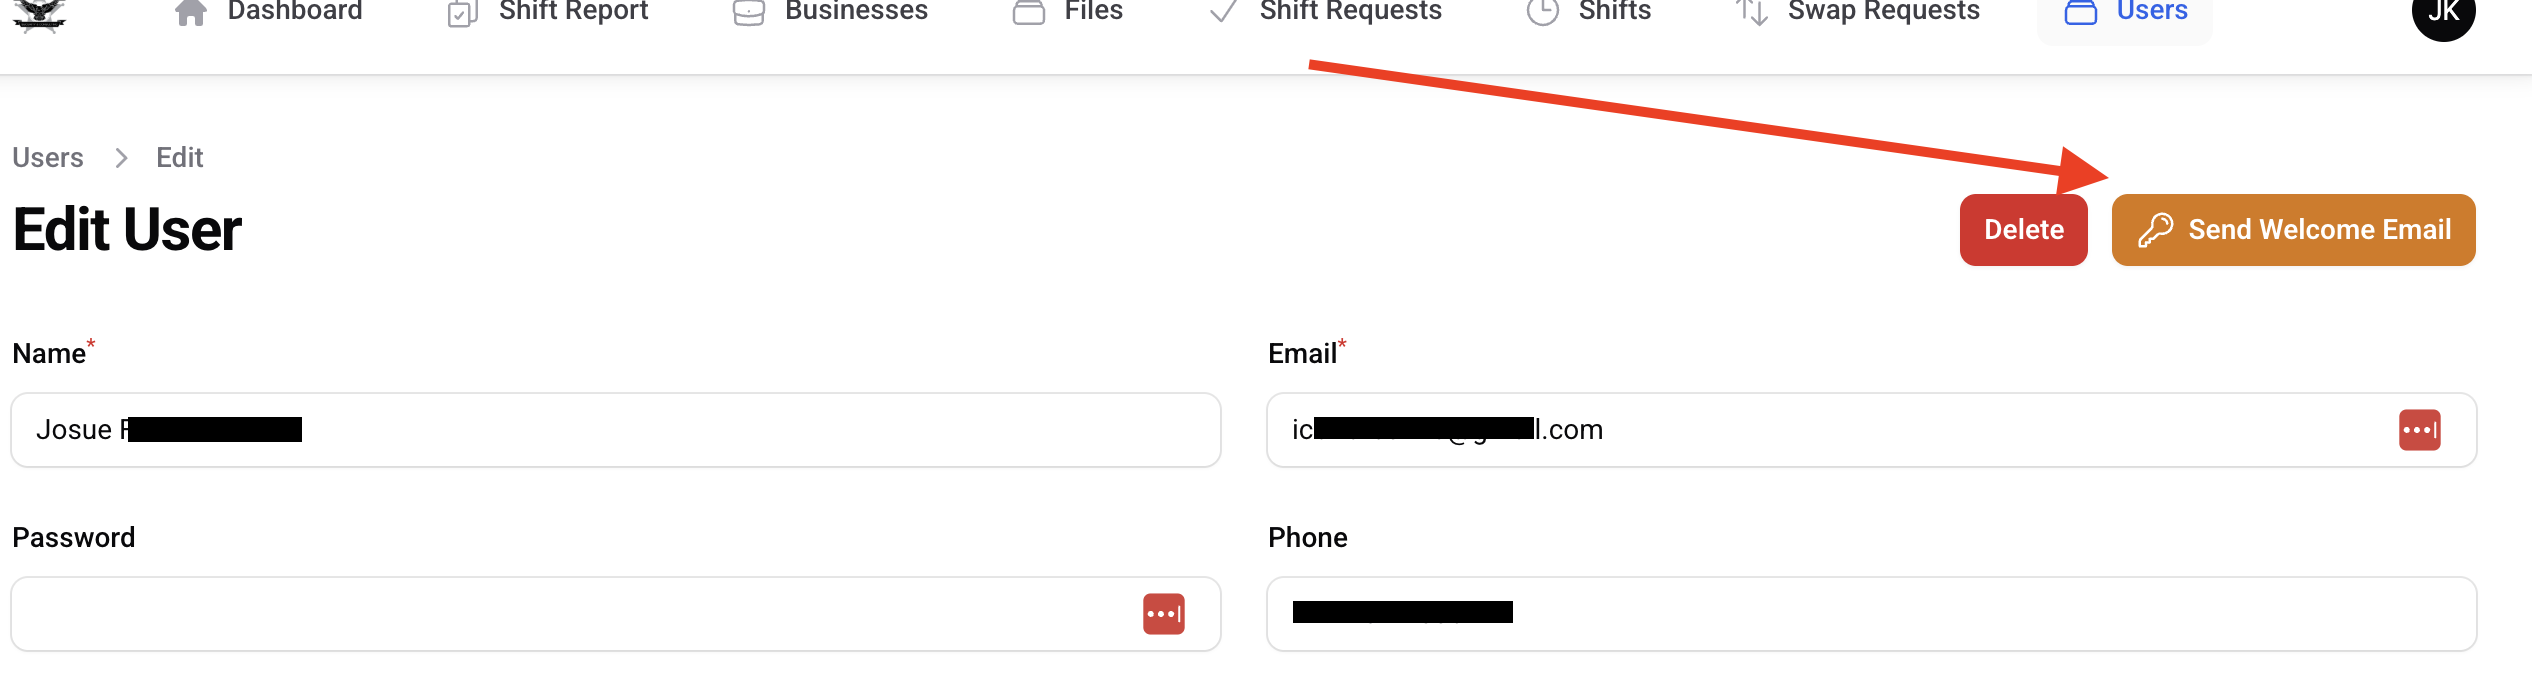
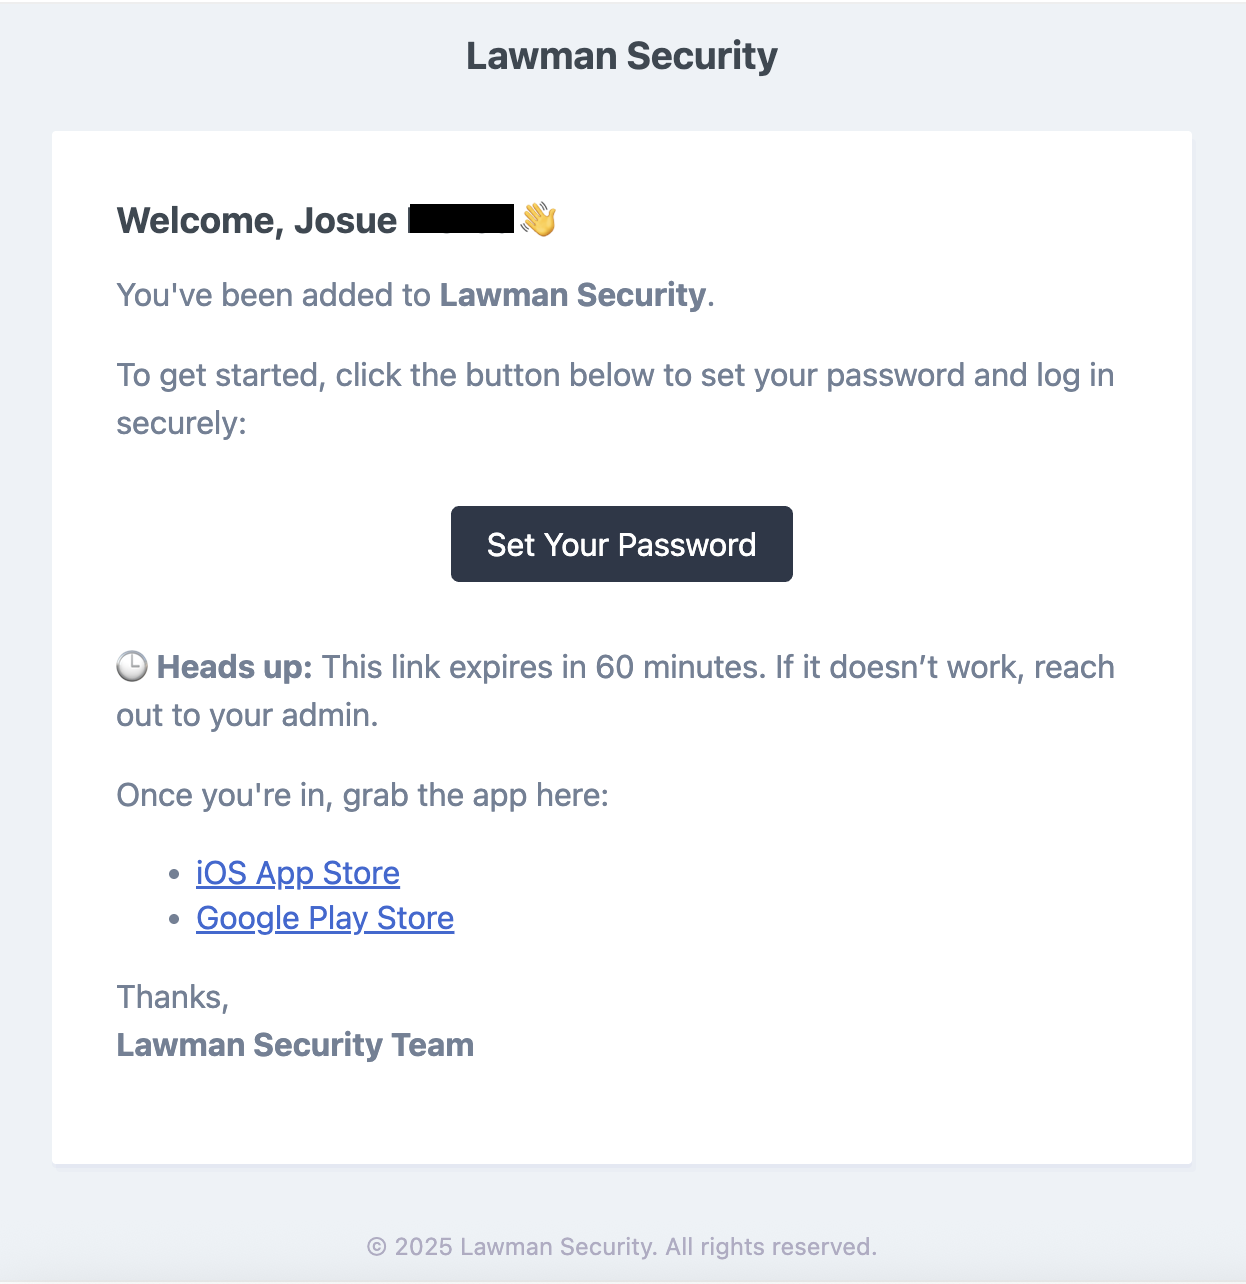
- The contractor will receivce a welcome email with a link that is good for 60 minutes that will allow them to access their account directly to update their password
Adding new shifts
Single Shift
- At the top of the "Shifts" section you can see the calendar widget
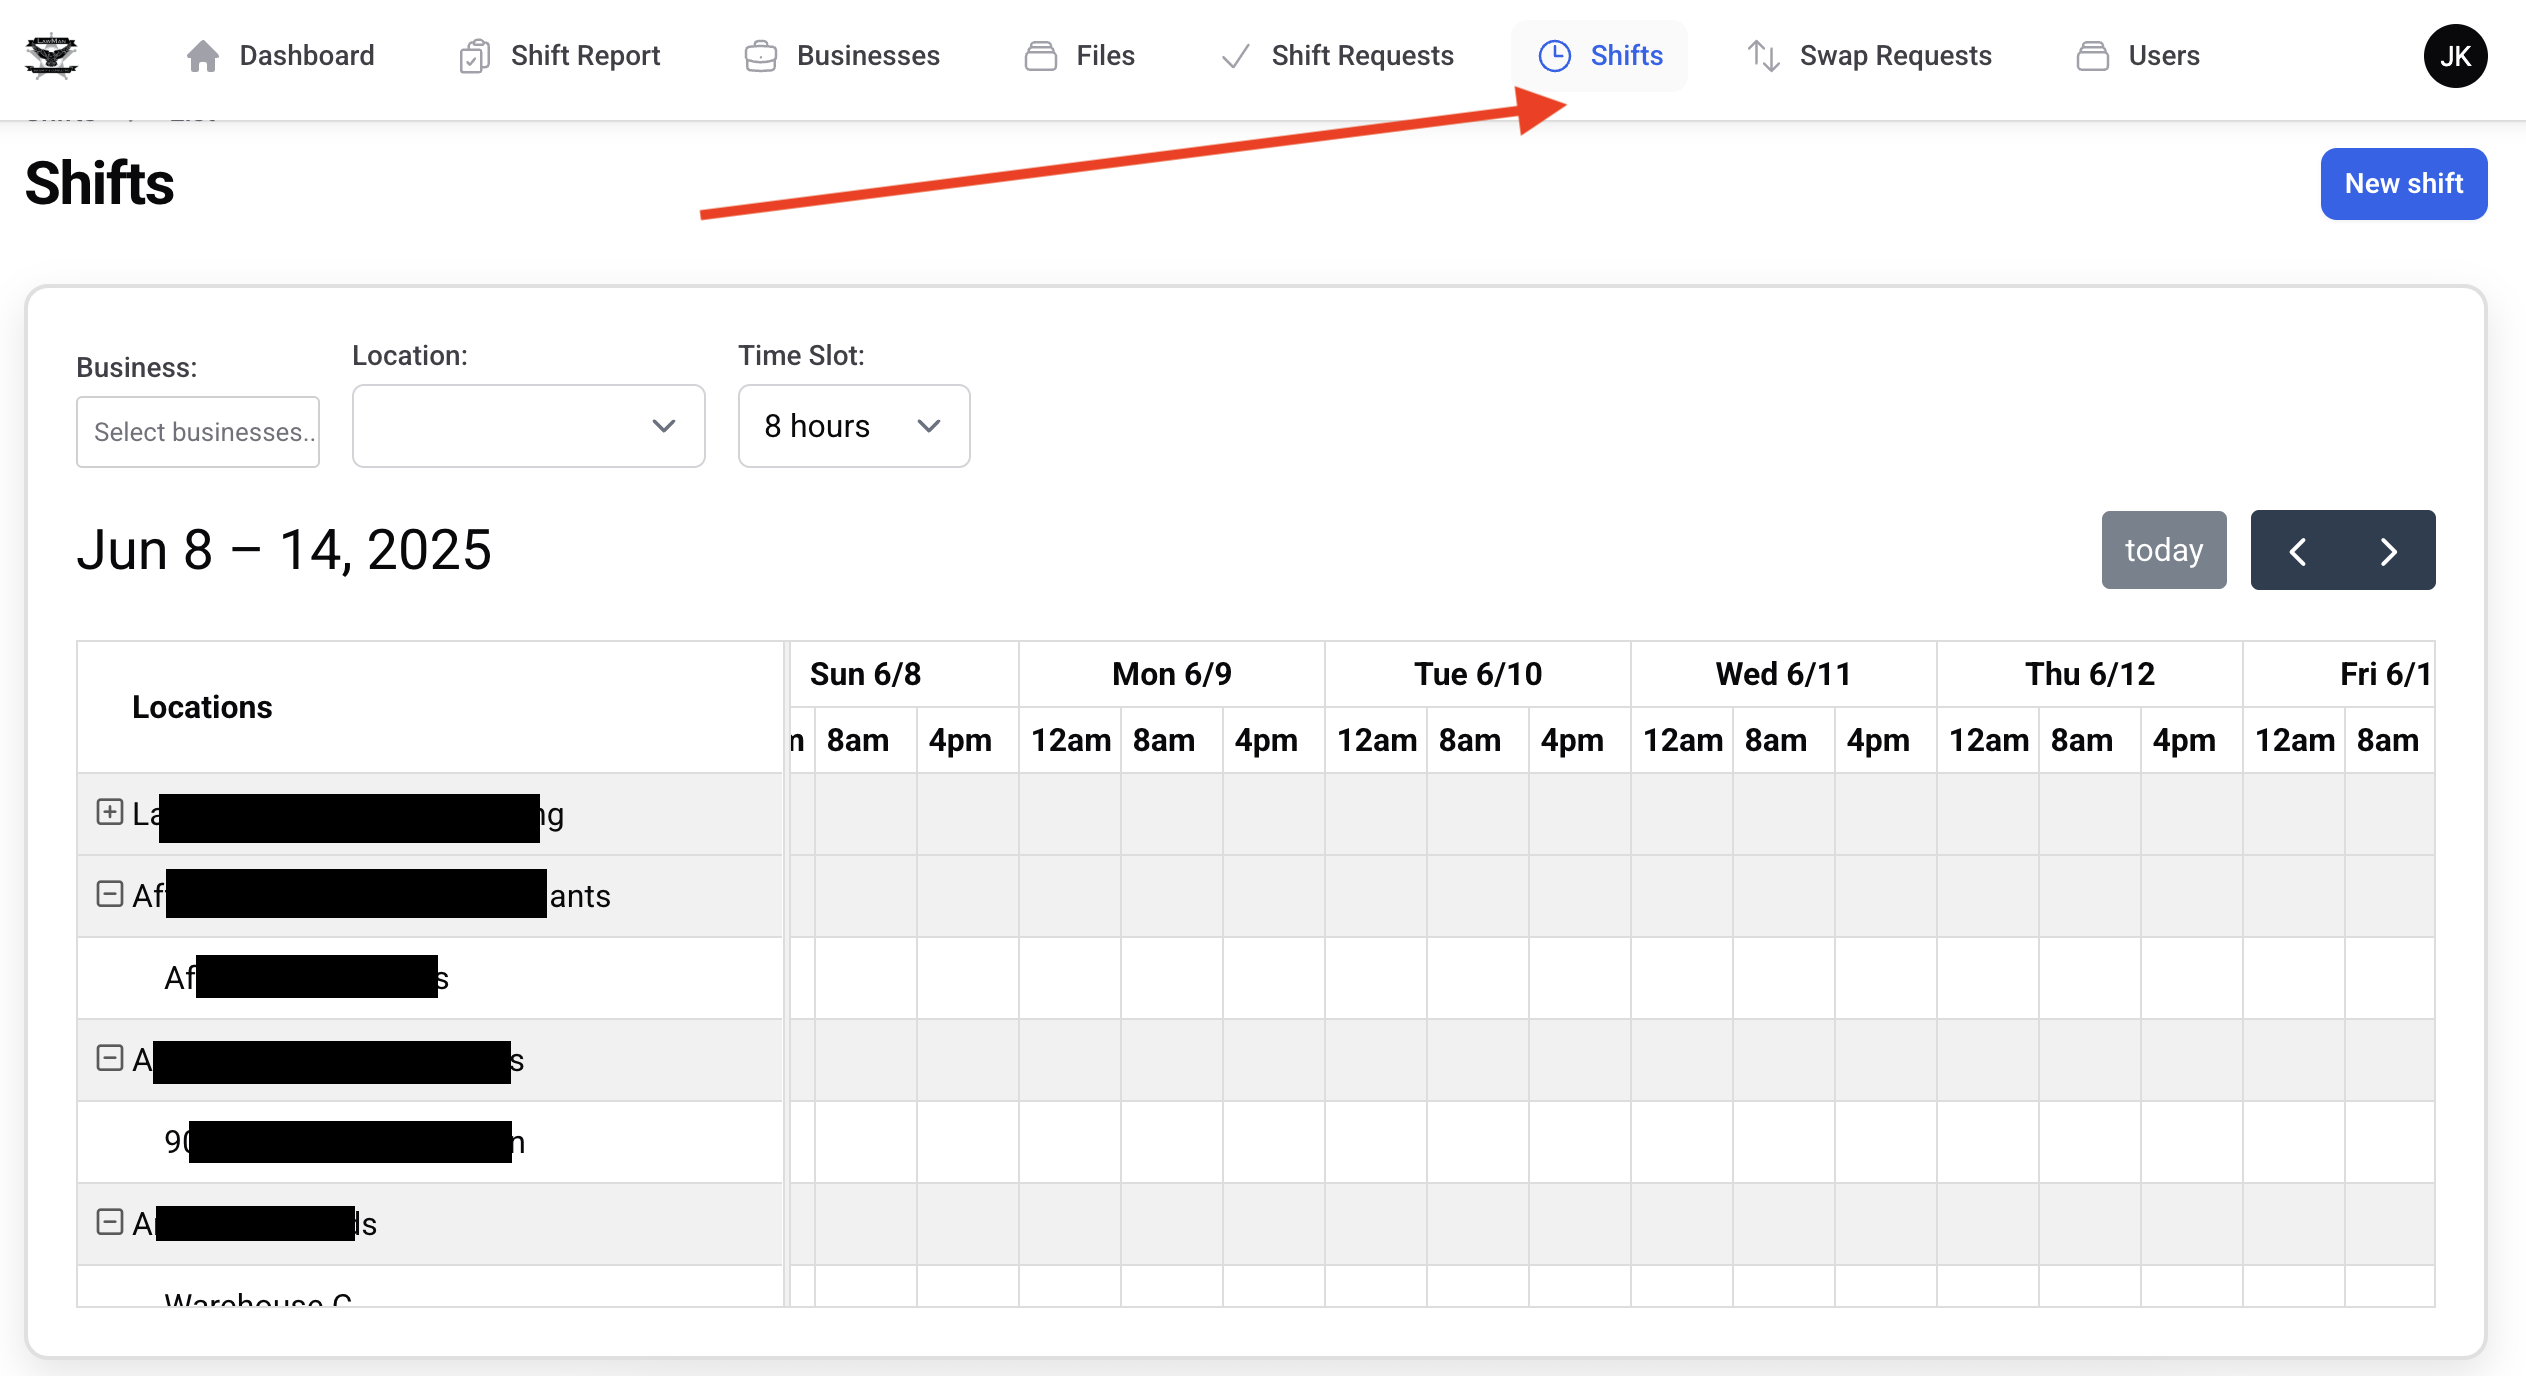
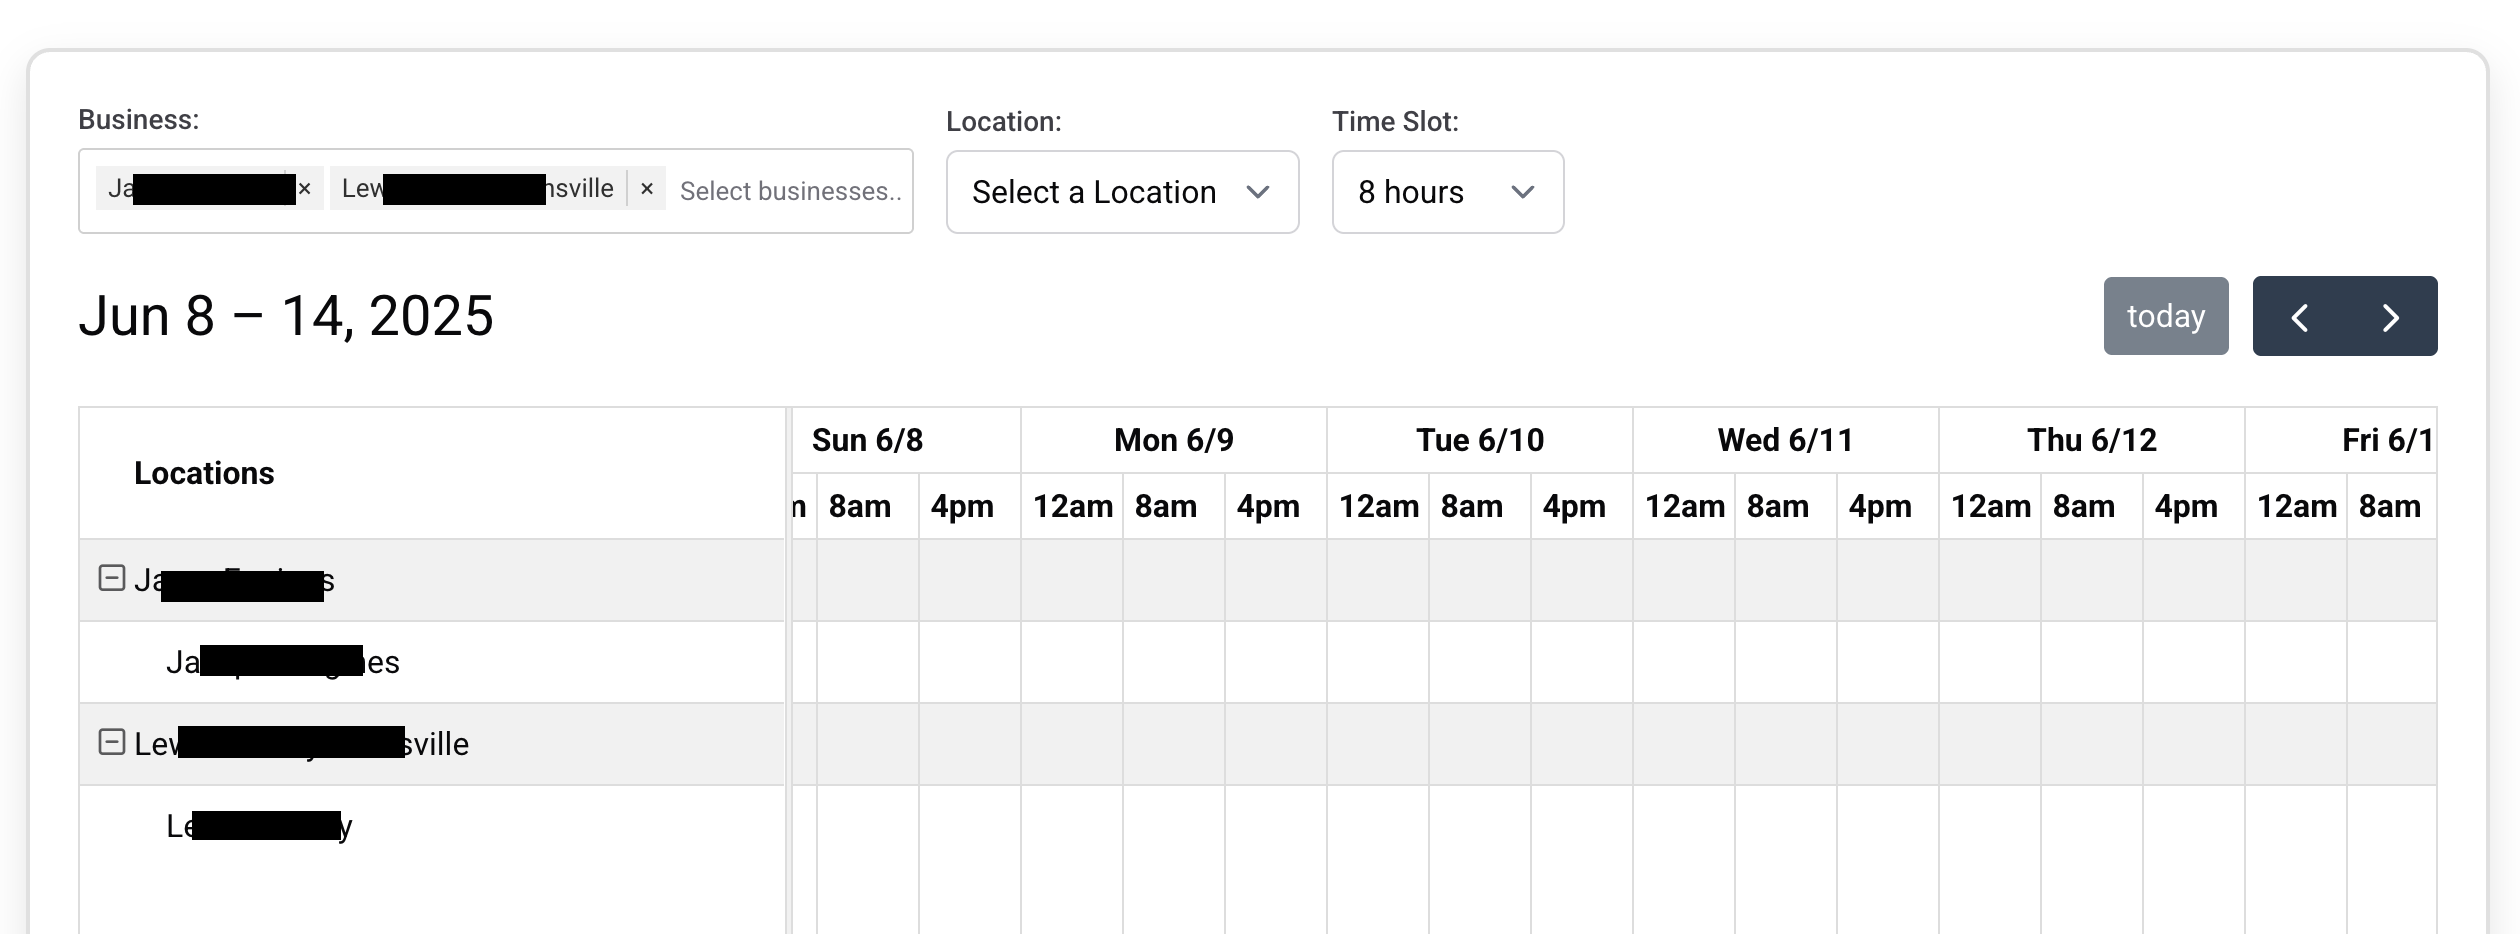
- You can filter for specific businesses via the search filter in the upper left
- Single shifts can be added 3 different ways
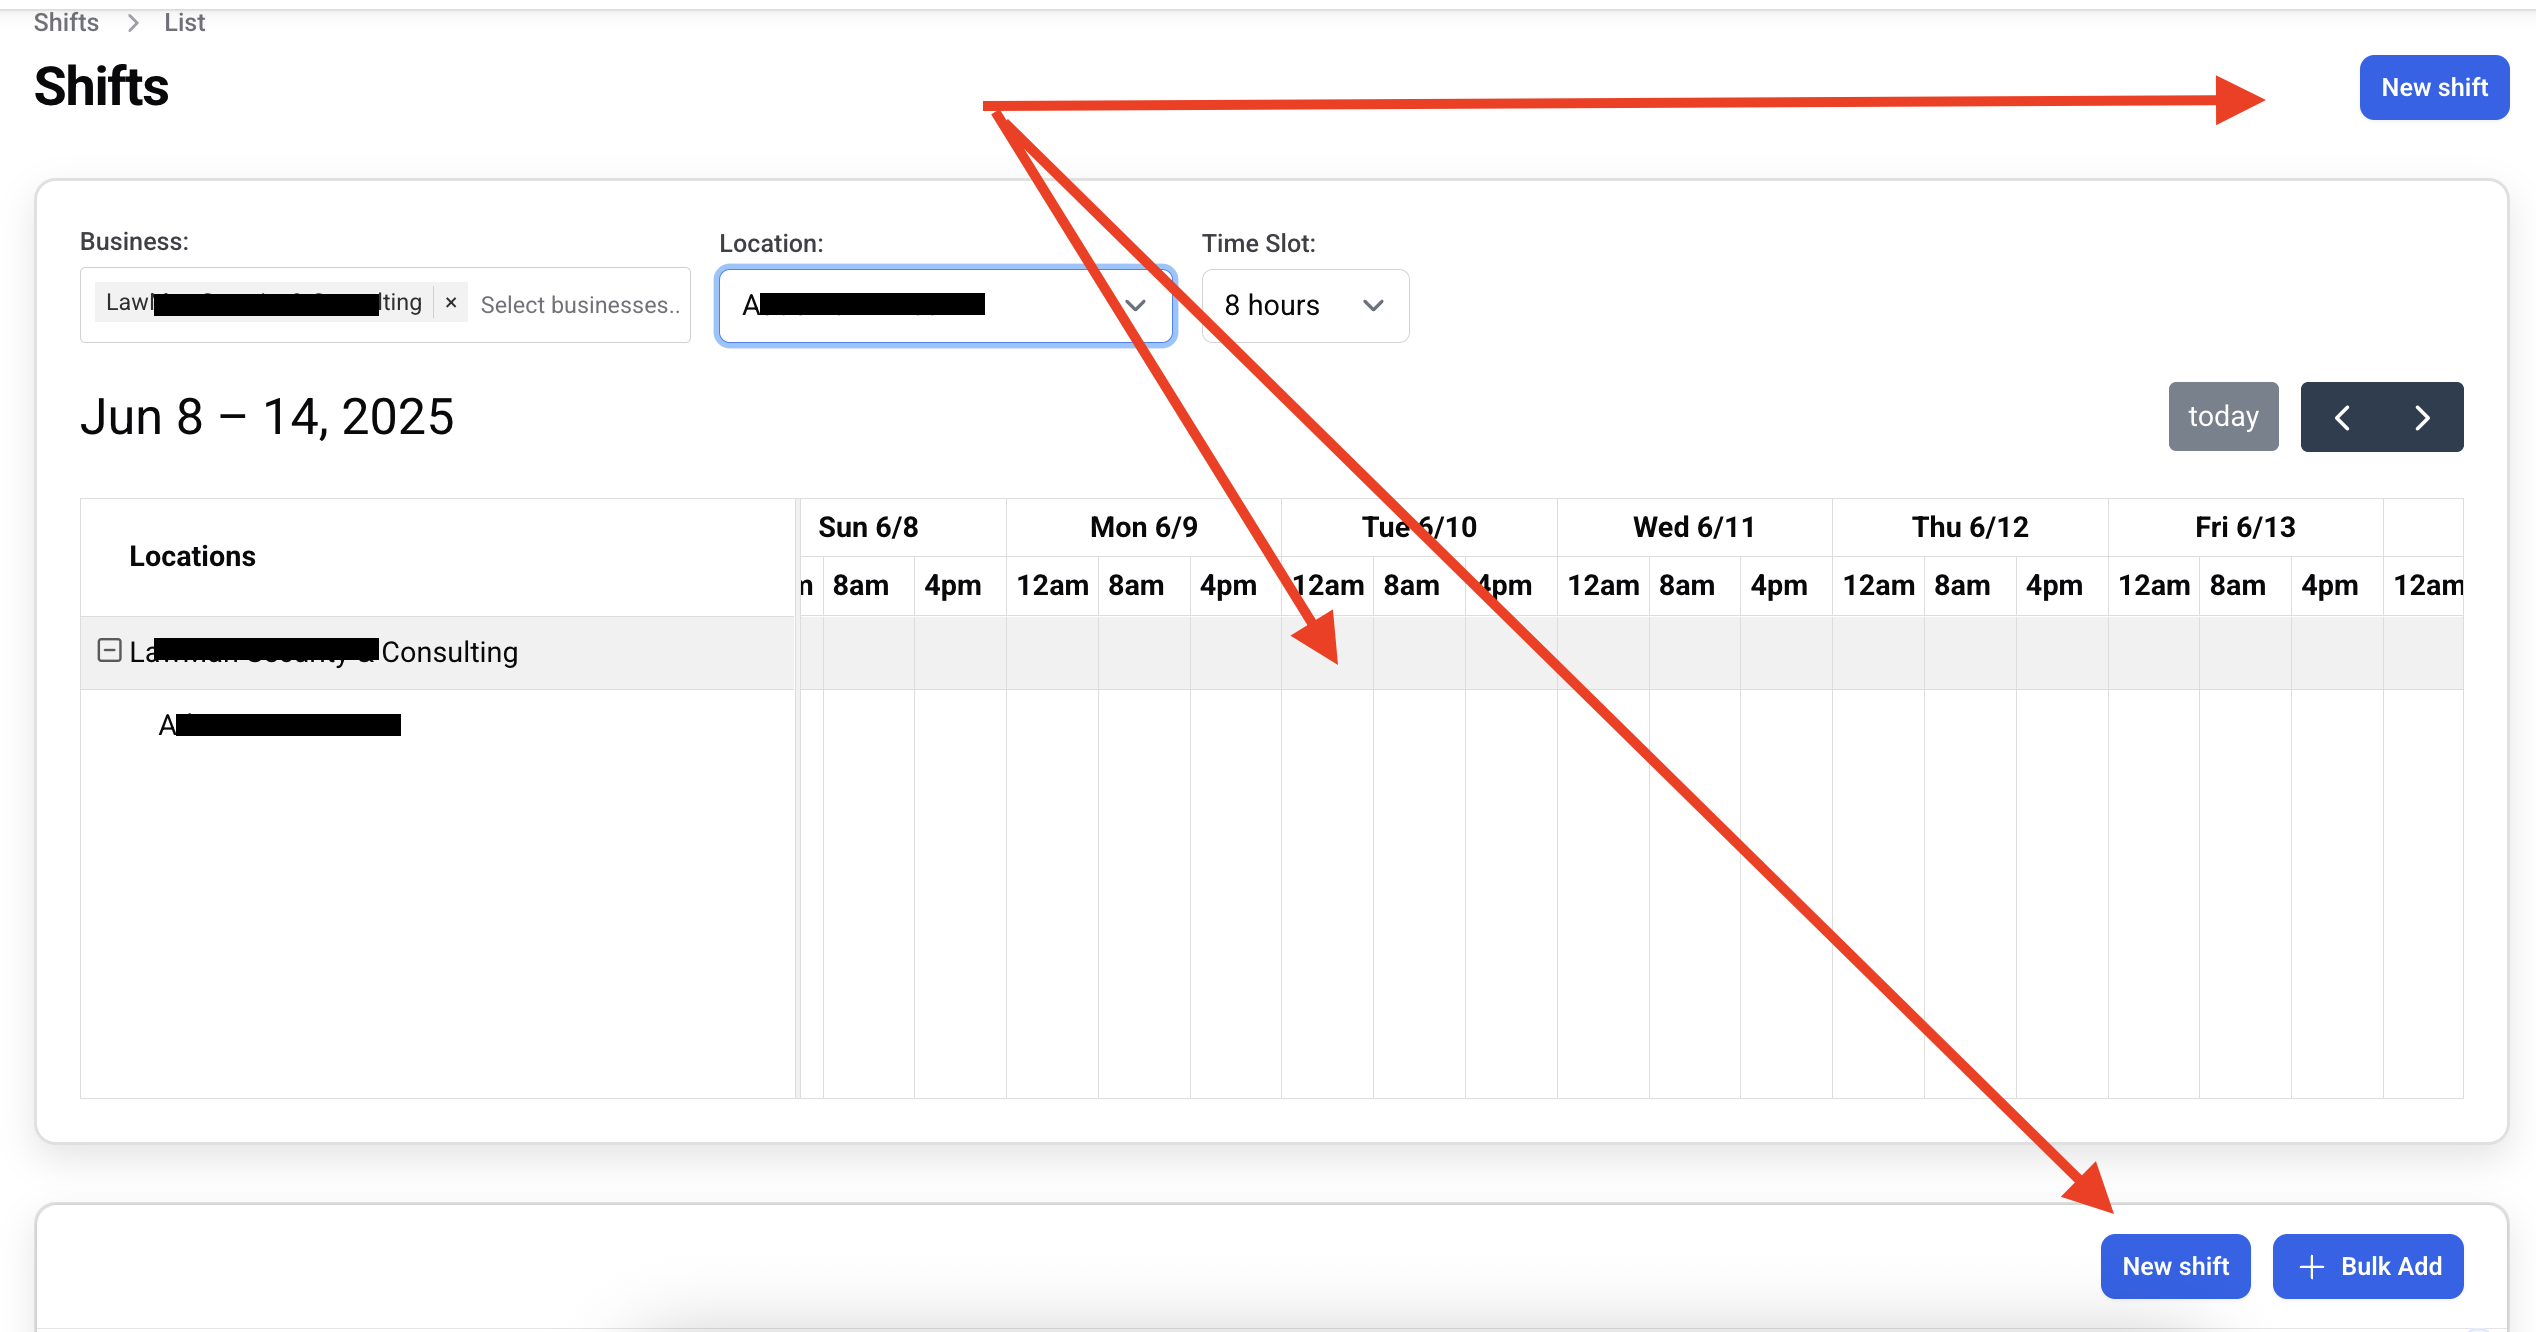
-
Clicking 'New Shift' will take you to the blank shift creation screen. No business, location, or time information will be populated:
-
If you click a time slot you'll be taken to the shift creation form with that time period and location pre-populated
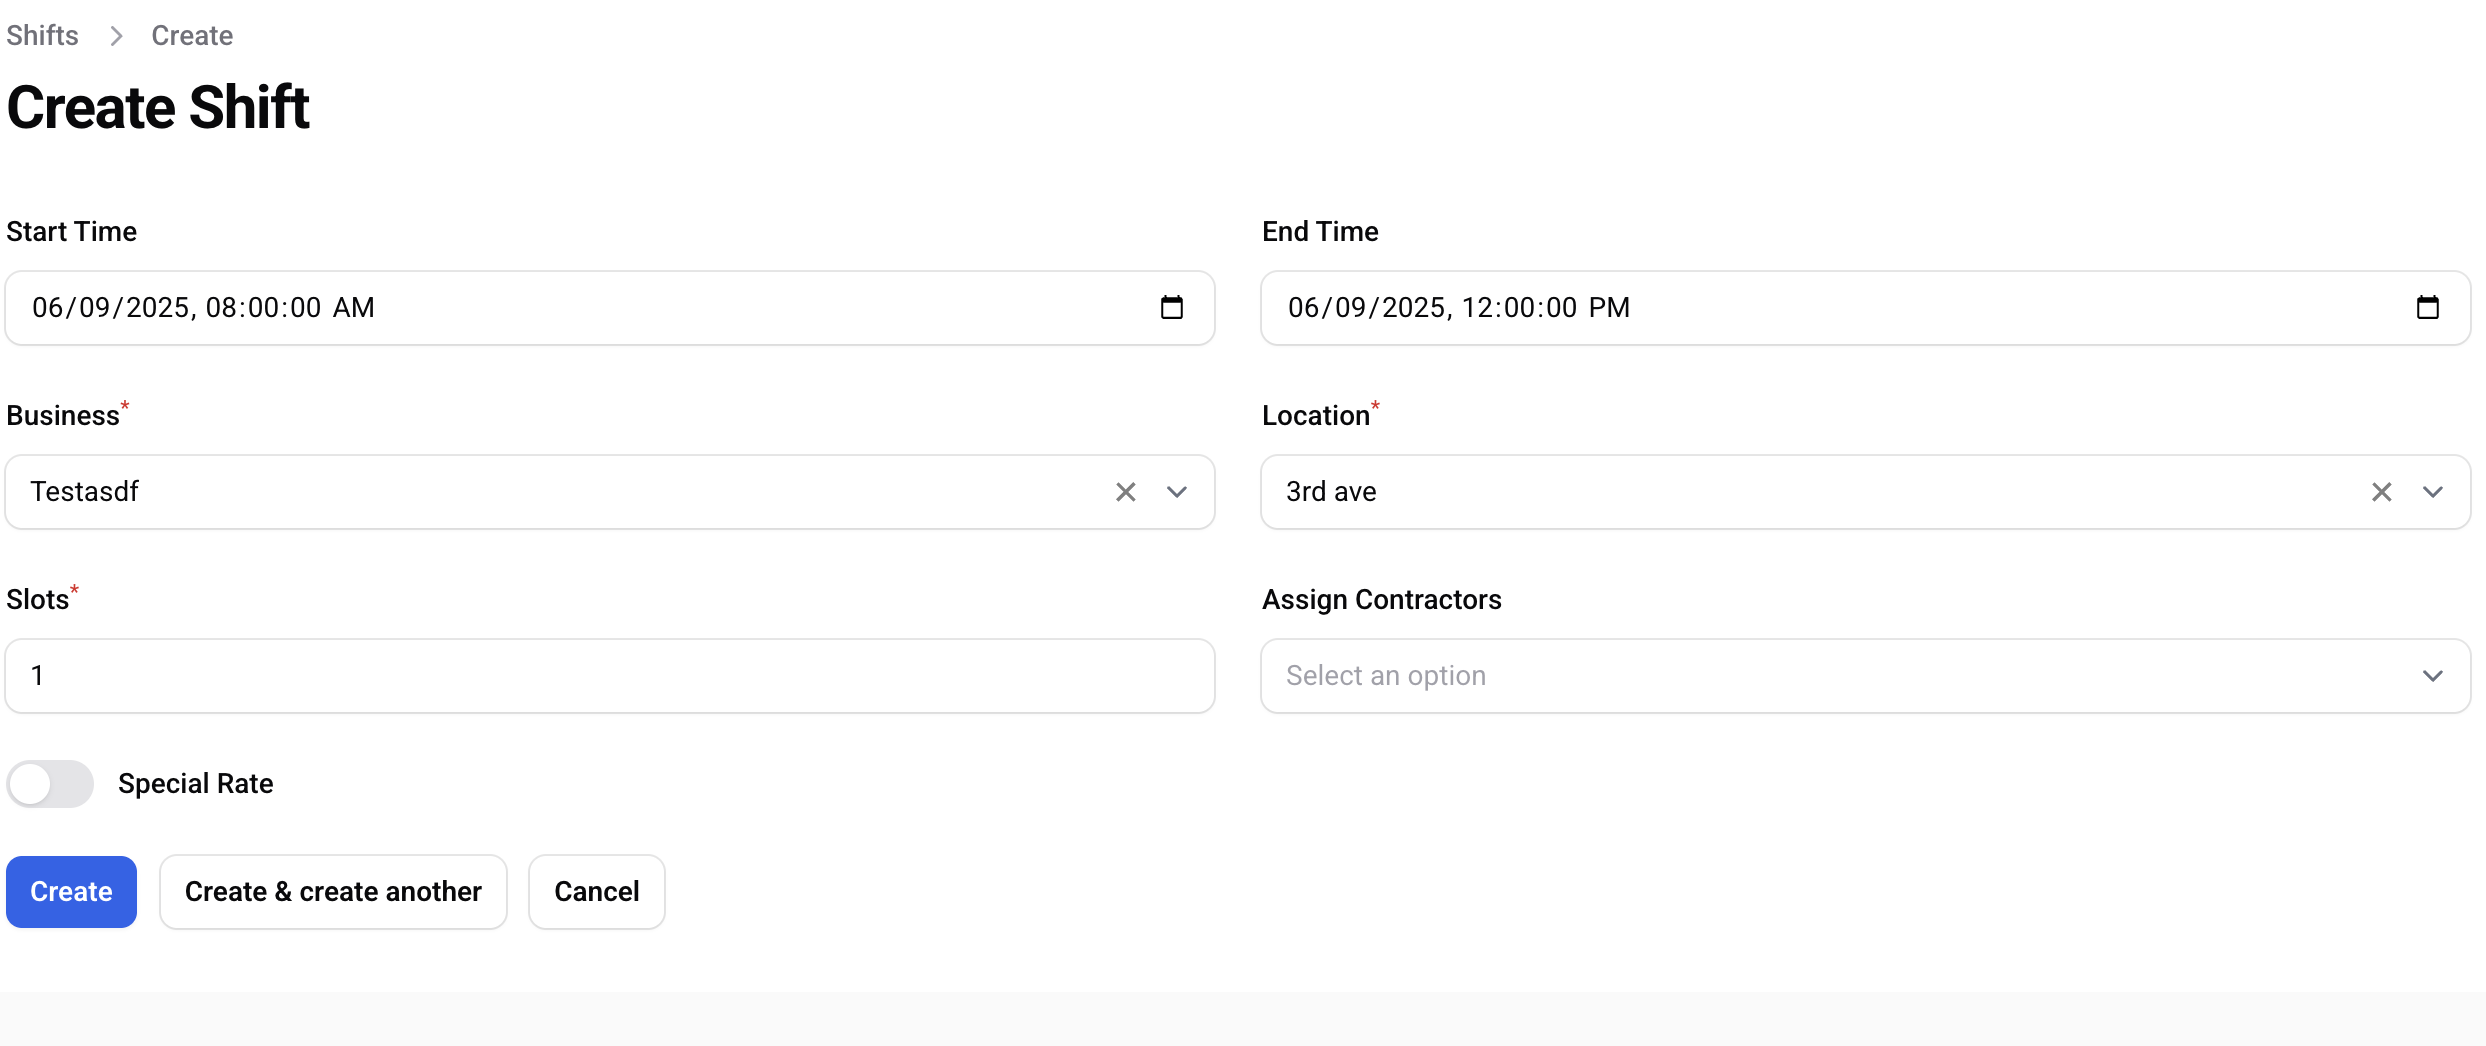
-
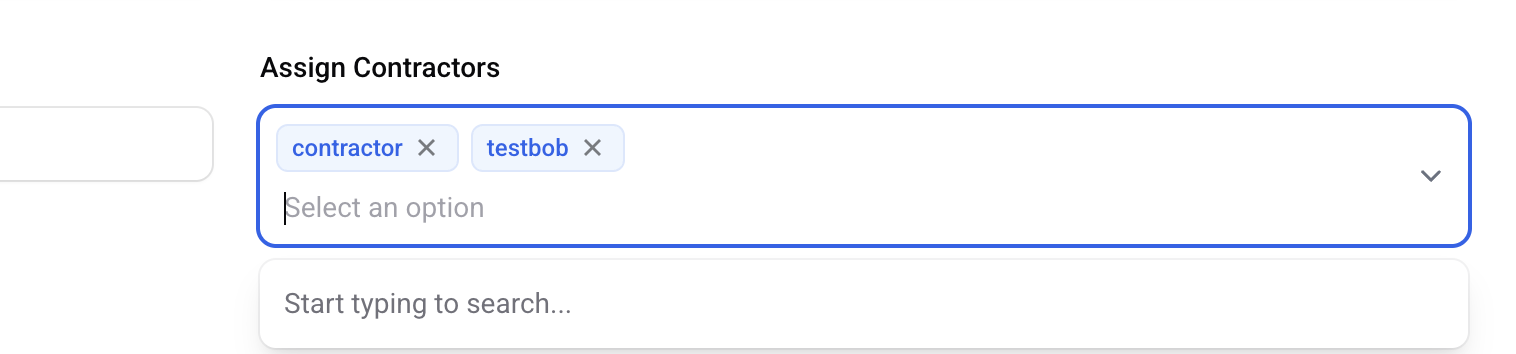
- You can toggle 'special rate' and enter in a special rate reason + rate. The reason will show on the shift report

- If you already know who is going to work a shift, you can assign them directly by choosing them from the contractor drop down. This dropdown will only show contractors who are associated with the business
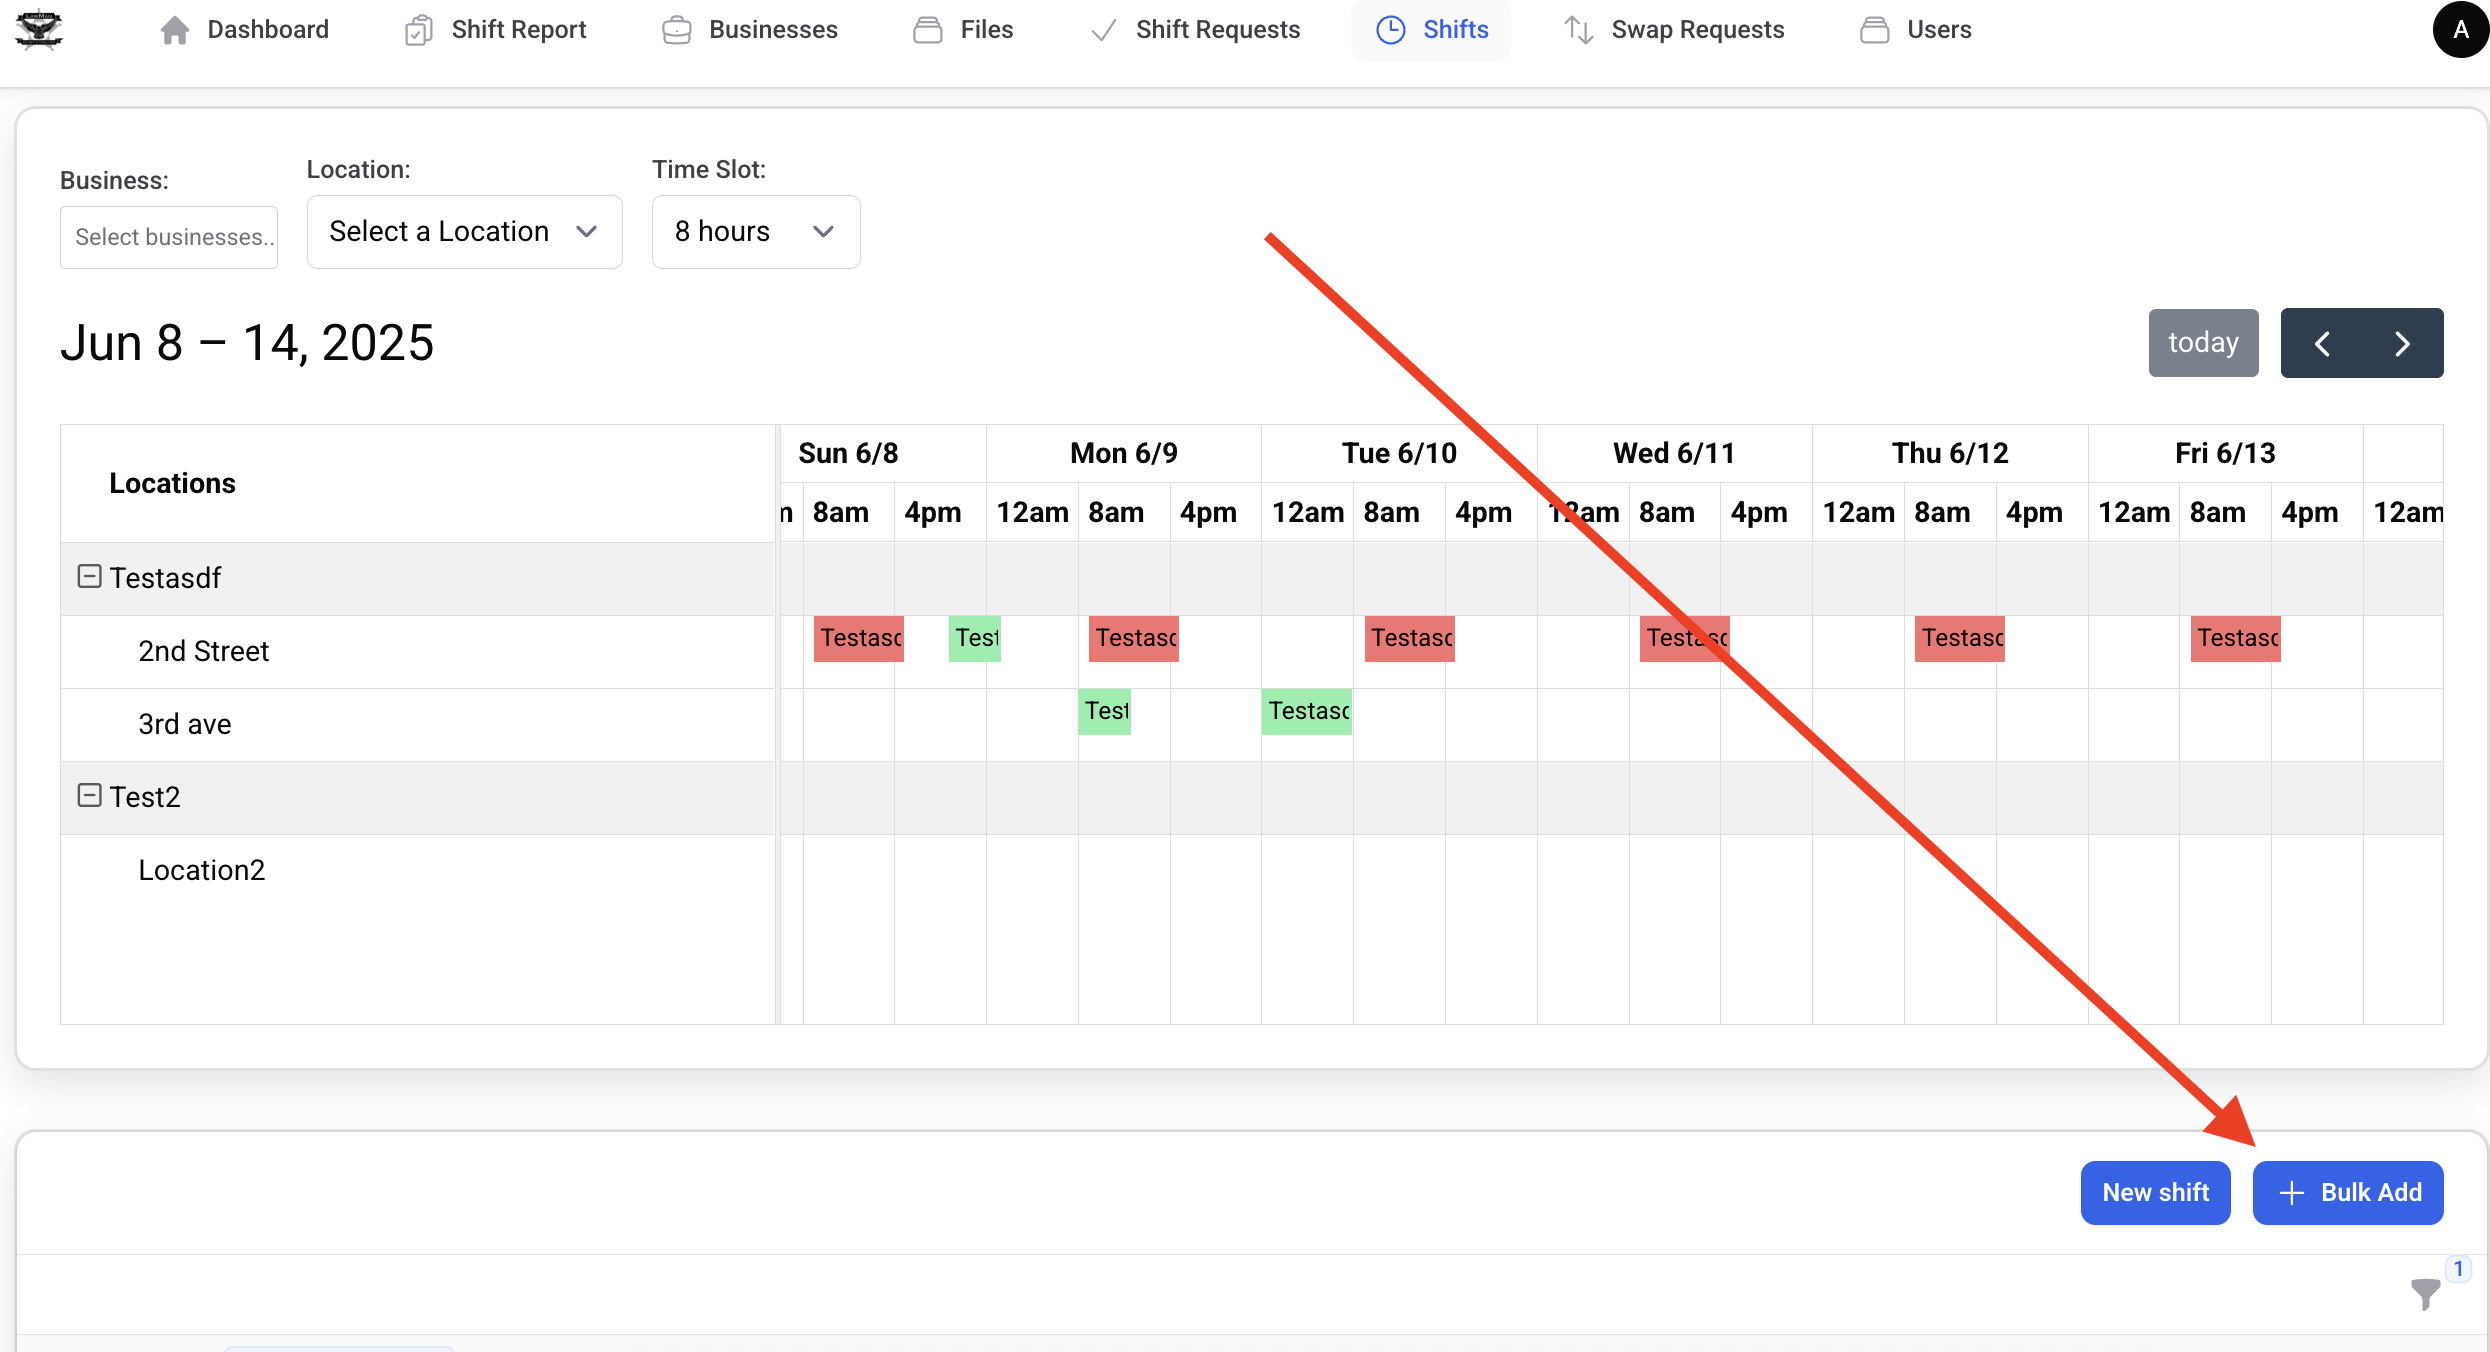
Bulk Add
- You can click the 'bulk add' below the calendar to add multiple shifts at once
- From there you can enter all the relevant shift information, similar to single add.
- The main difference is in the date/time section. In the bulk edit, you can select start time, end time, start date, end date, and days of the week. If you wanted to create shifts from 9a-5pm every wednesday and friday in the month of July, your selection would look like the following:
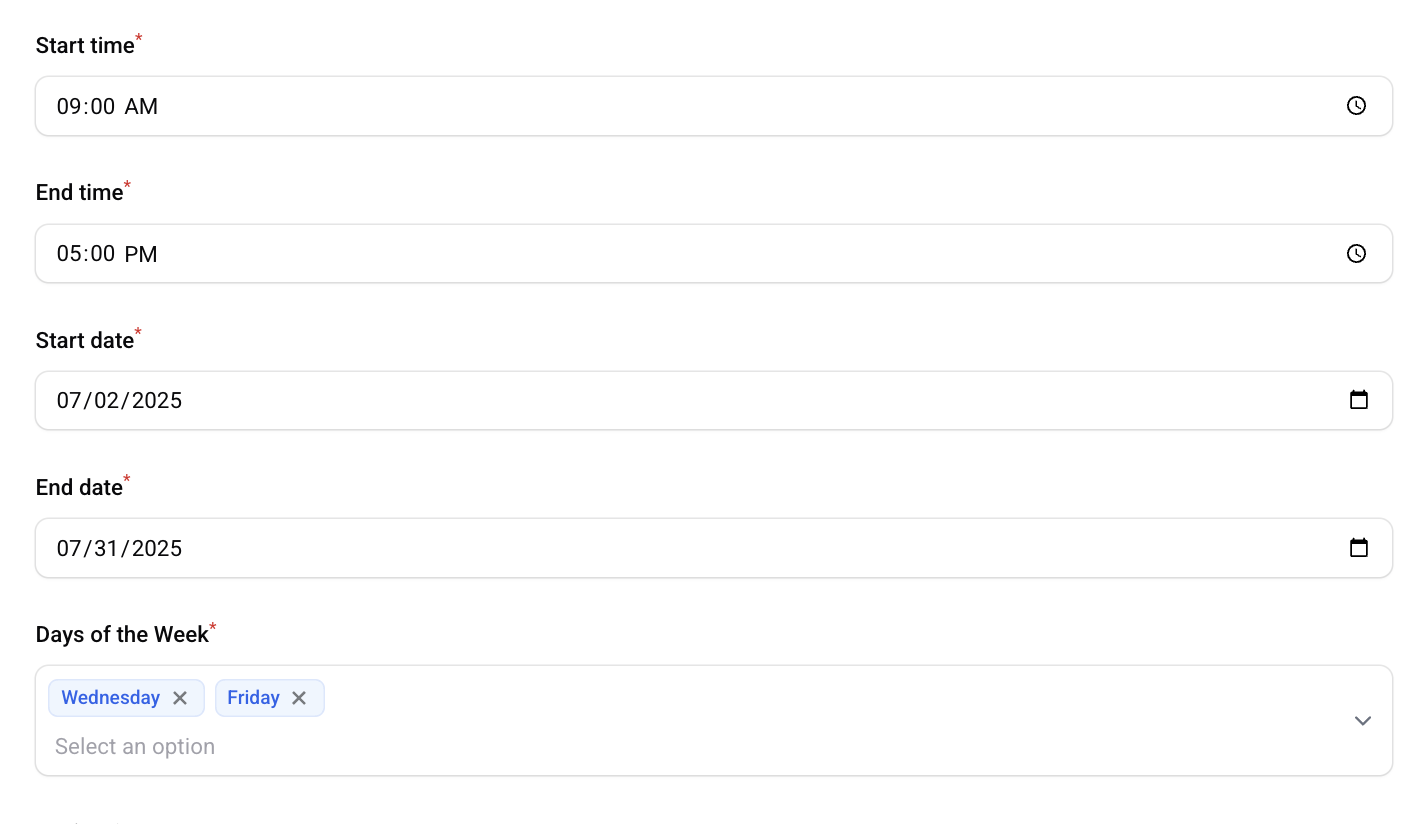 After hitting 'submit', shifts would be created on July 2, 4, 9, 11, 16, 18, 23, 25, 30 for 9a-5pm
Managing Shifts
- At the bottom of the shifts page, you can see a list of all shifts. It defaults to showing future shift only.
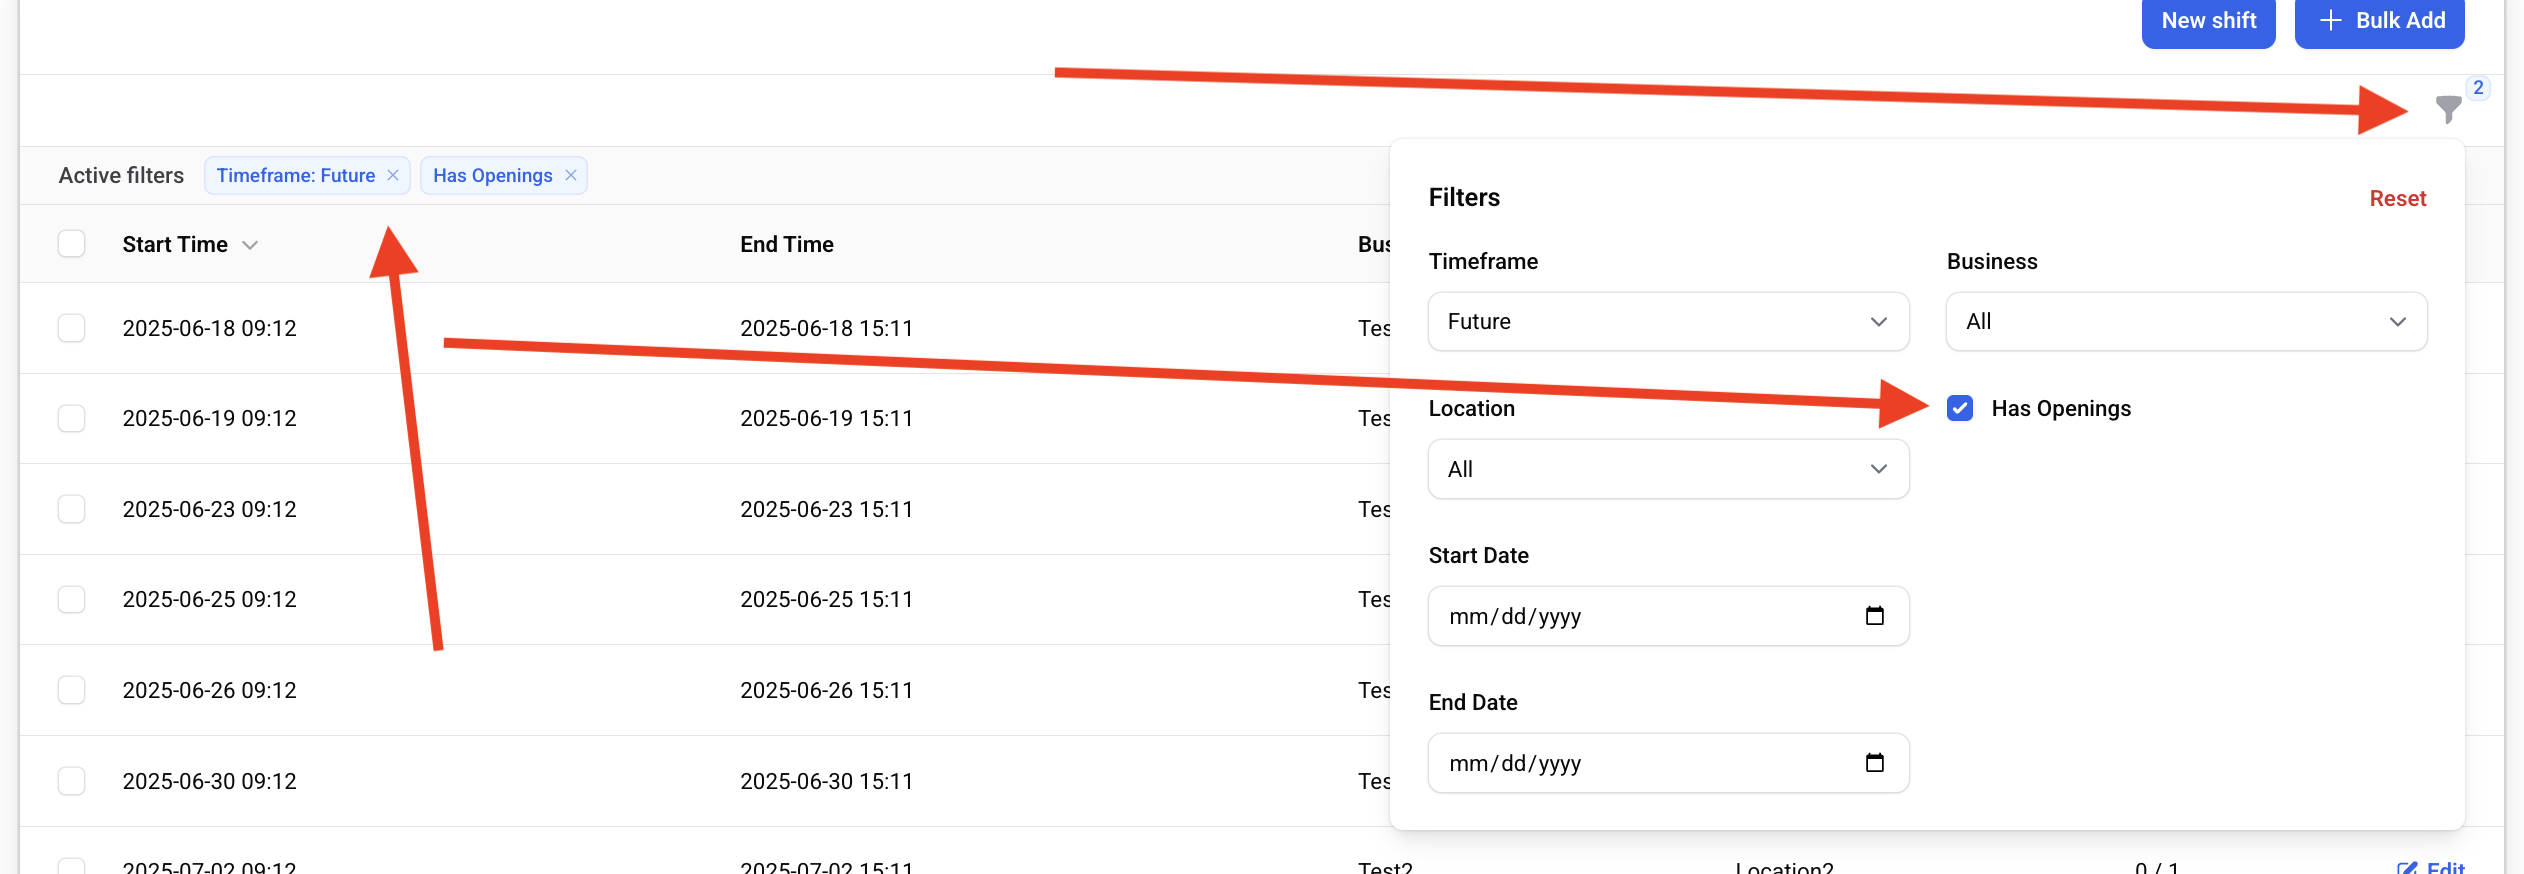
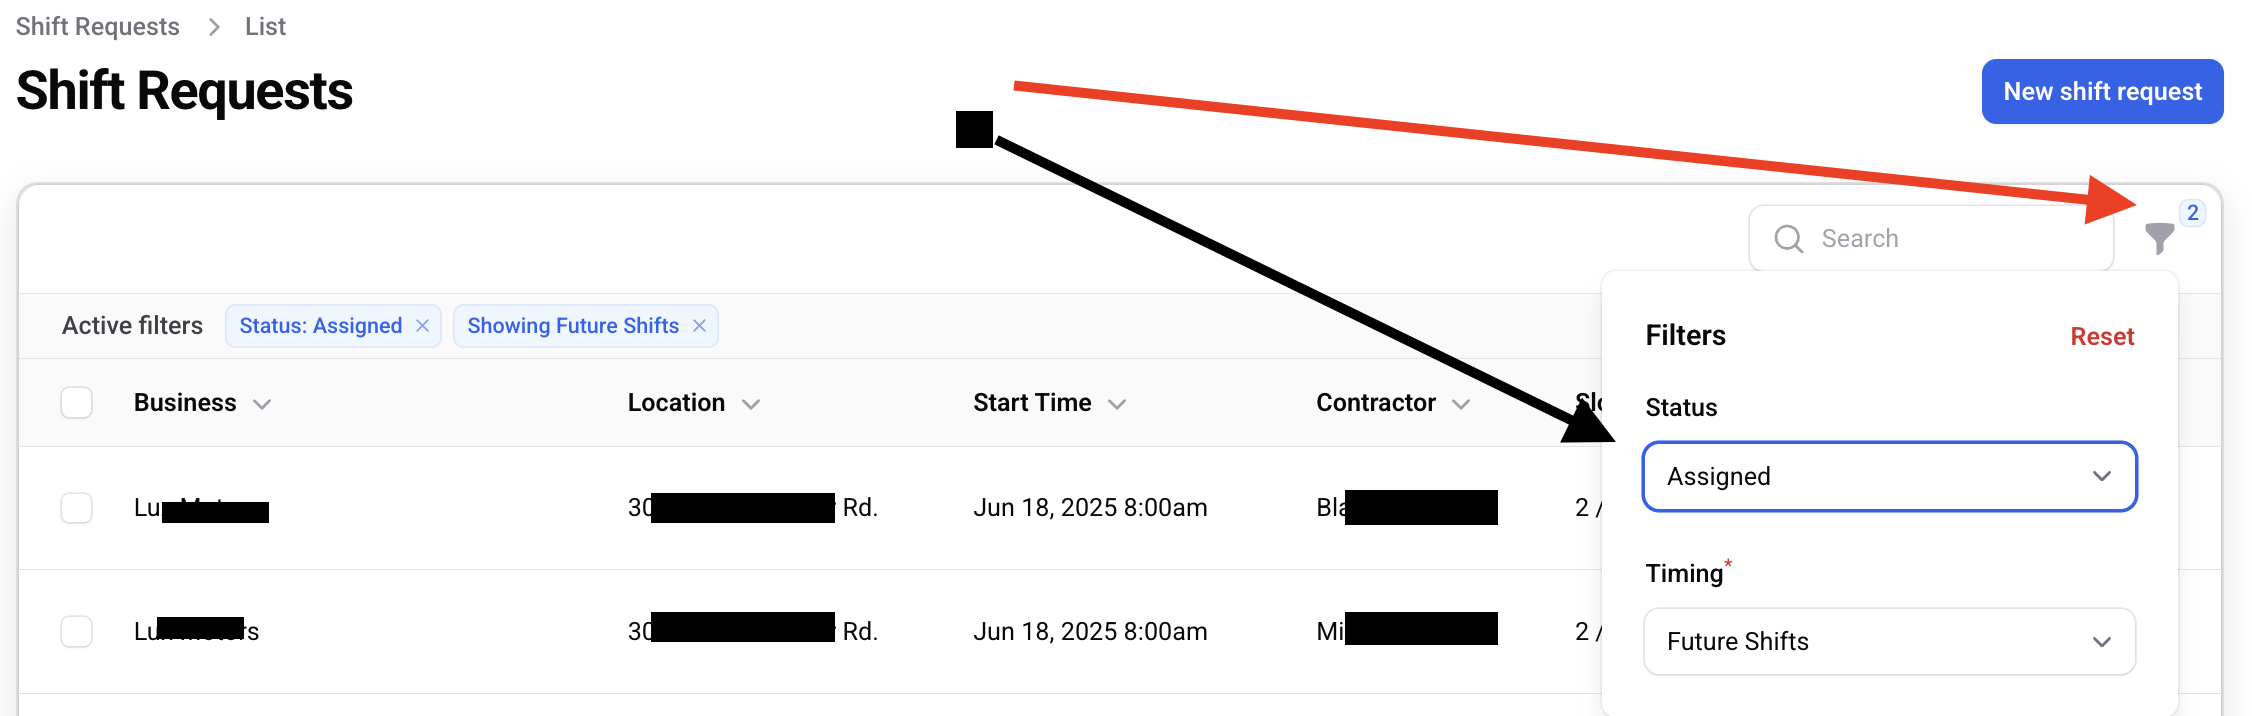
- You can click the filtering icon in the upper right to filter the shifts. Filters can be removed by clicking the 'x' next to the list of active filters to the left.
Approving Shift Requests (from Shift Edit)
- If there are open slots, contractors can request the open shift
- You can see a list of requests at the bottom of the edit screen for that shift
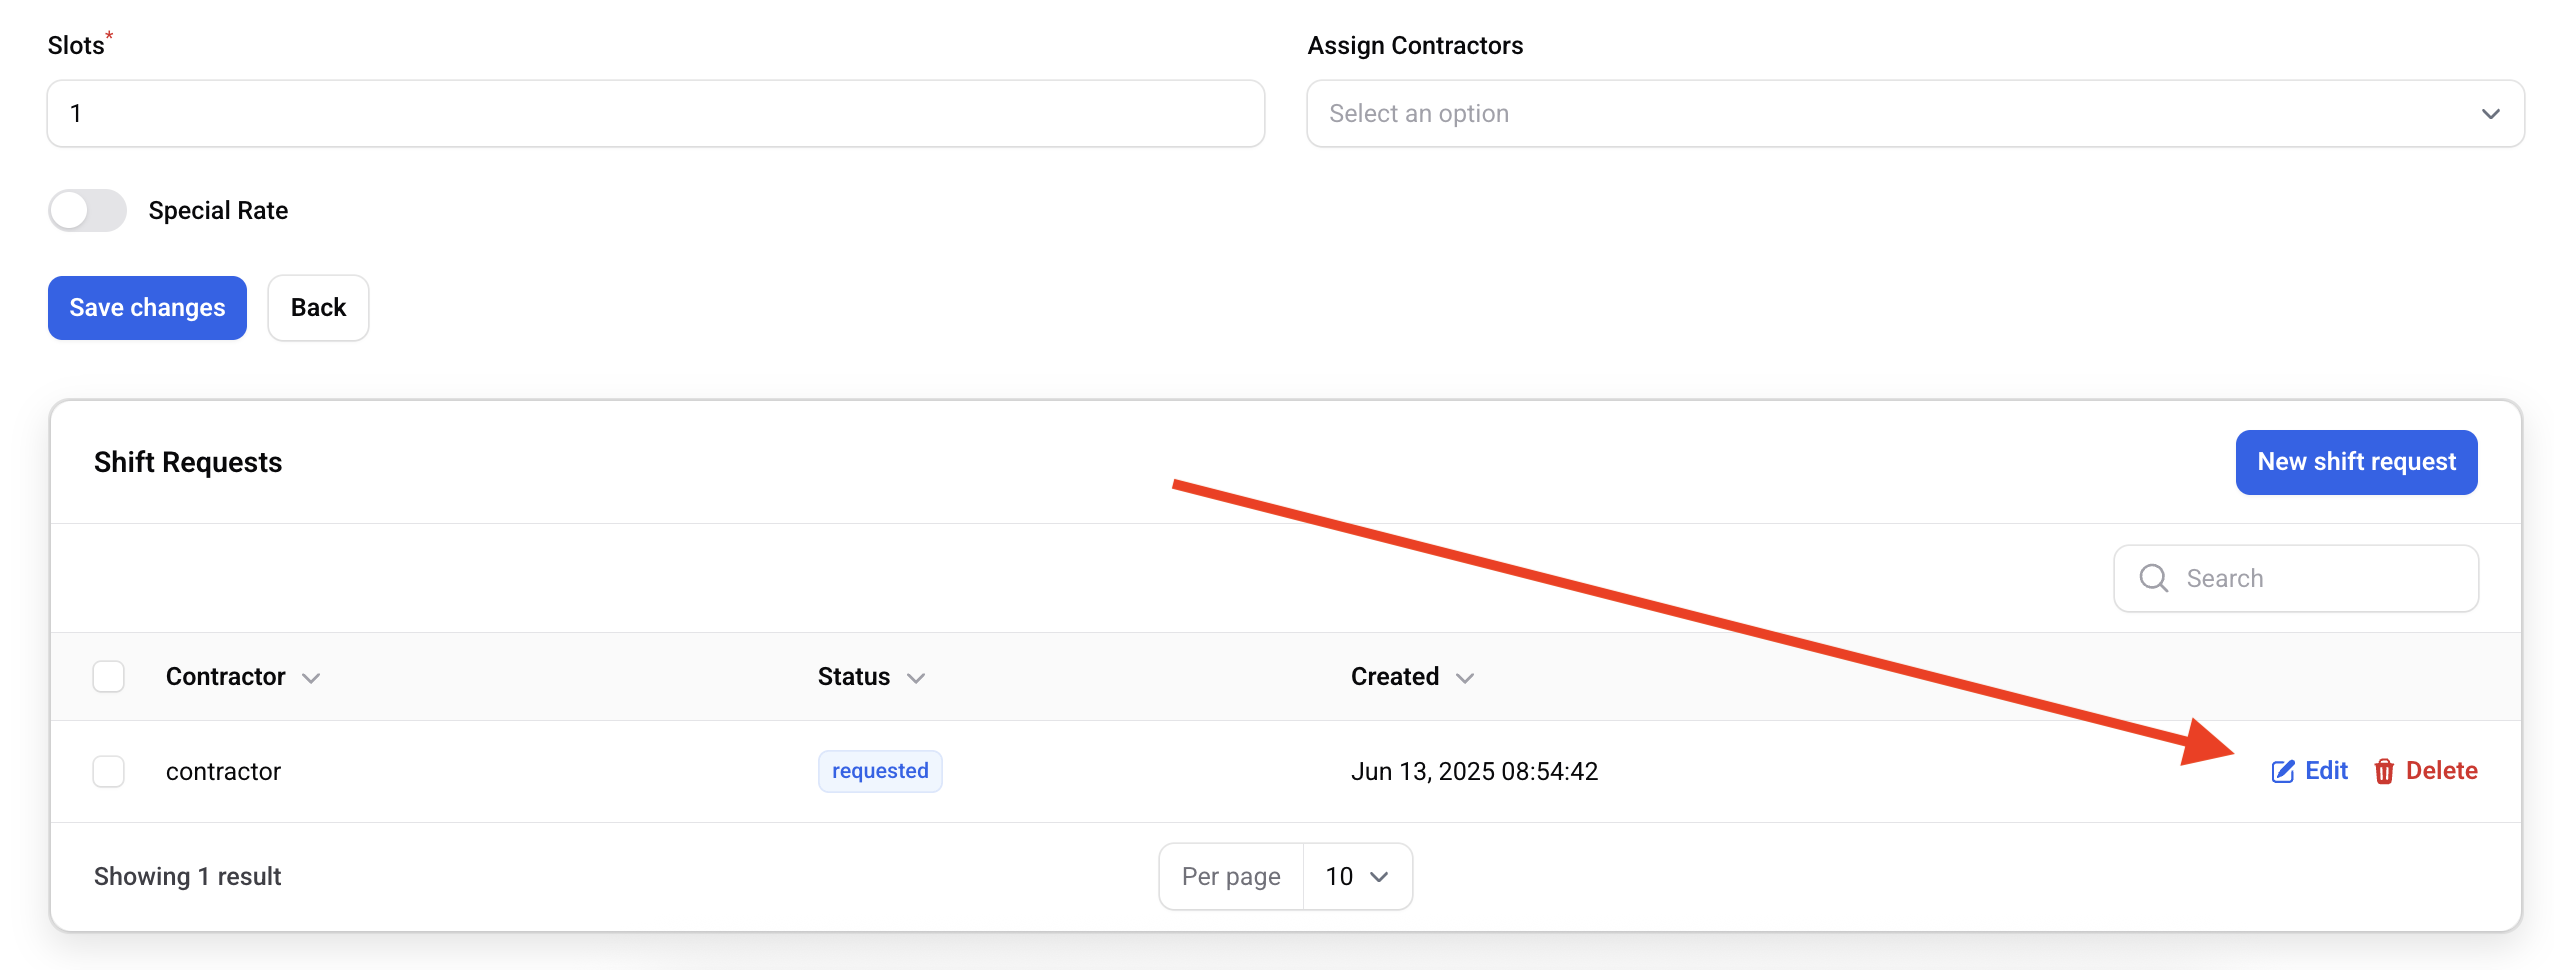
- Once you do that, you can change the status to approved, rejected, or requested (you can change it back to requested in the event a mistake occured)
Approving Shift Requests (from Shift Requests)
You can view all pending shift requests from the "Shift Requests" panel. To approve a shift request, simply change the dropdown from "Requested" to "Assigned". You can also set it to "Rejected".
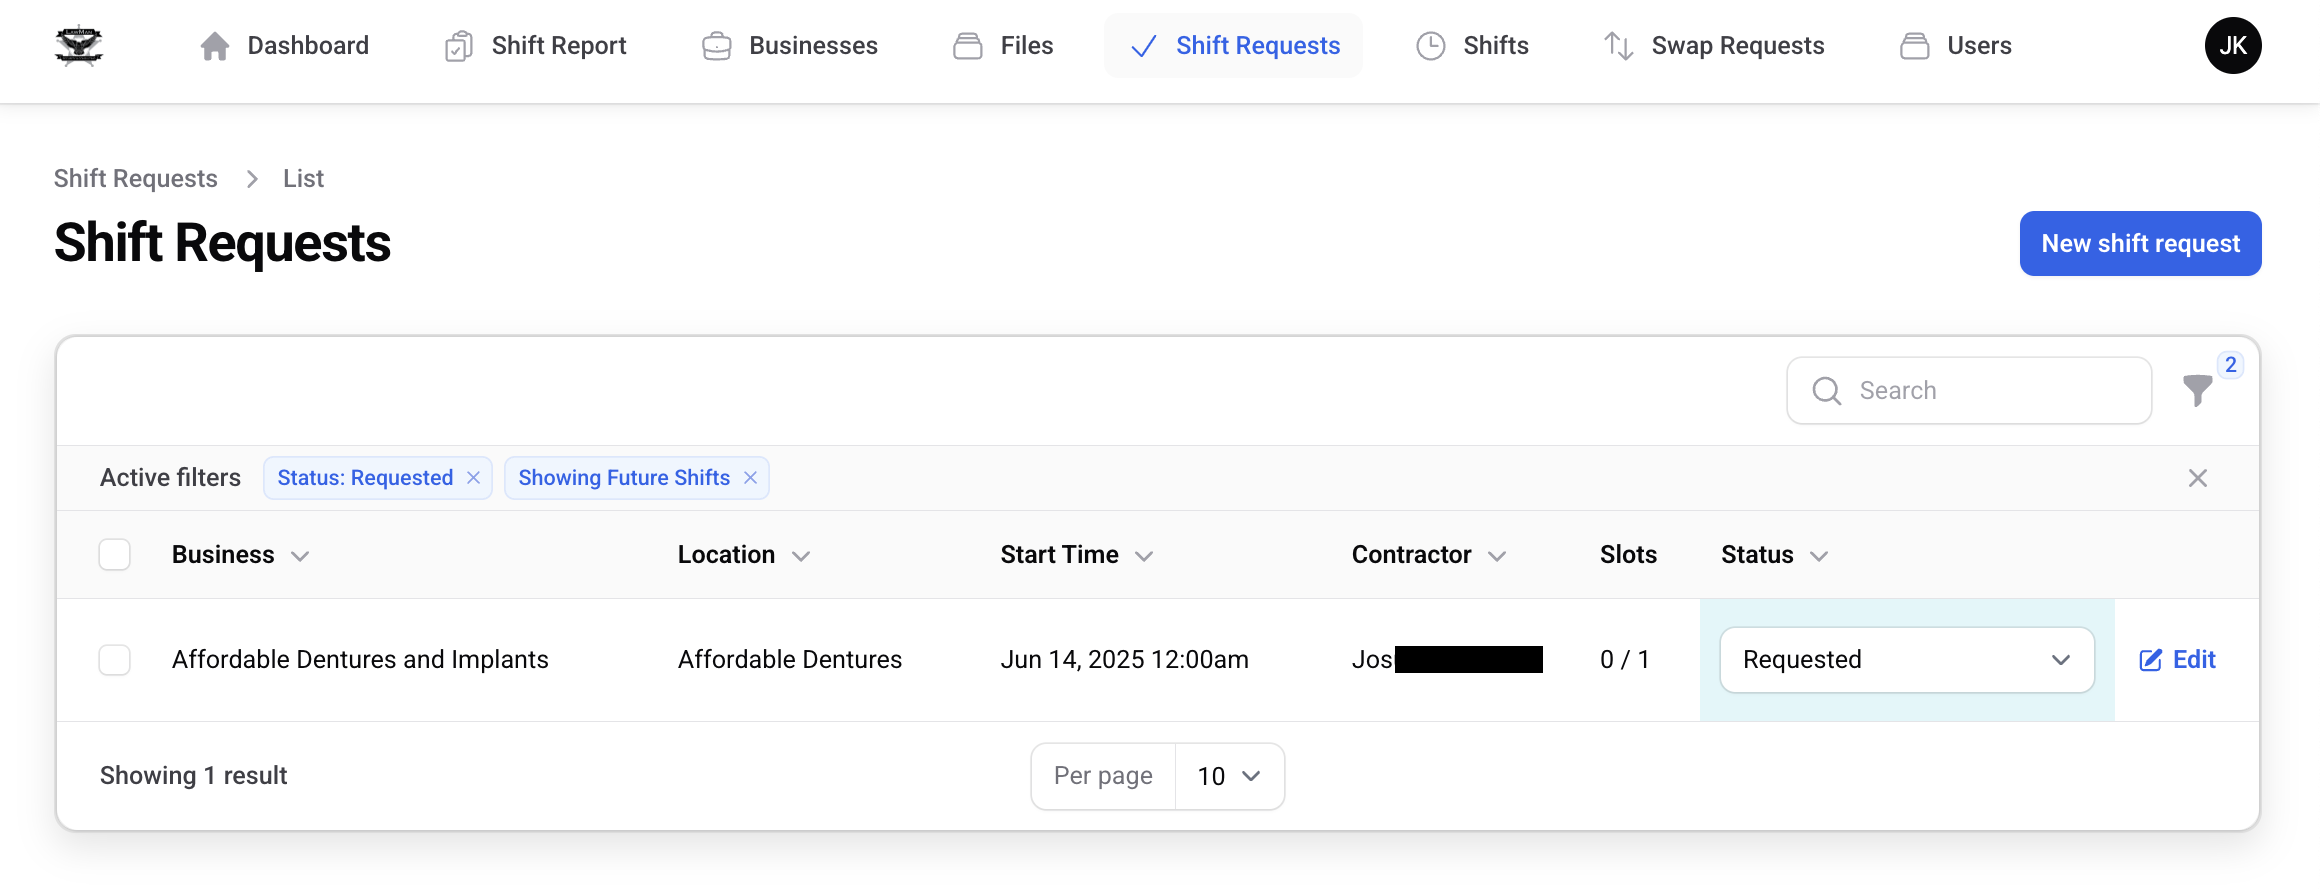
You can filter to view already assigned or even past shift requests
Approving/assigning swap requests
After a contractor has requested a swap request you can approve or reject it in the "Swap Requests" section.

If someone has already requested the swap request, they will be pre-populated in the dropdown. Otherwise, you can choose an option.
If the swap request is approved, the previous contractor is no longer responsible for the shift and it will not show up in their upcoming shifts list.